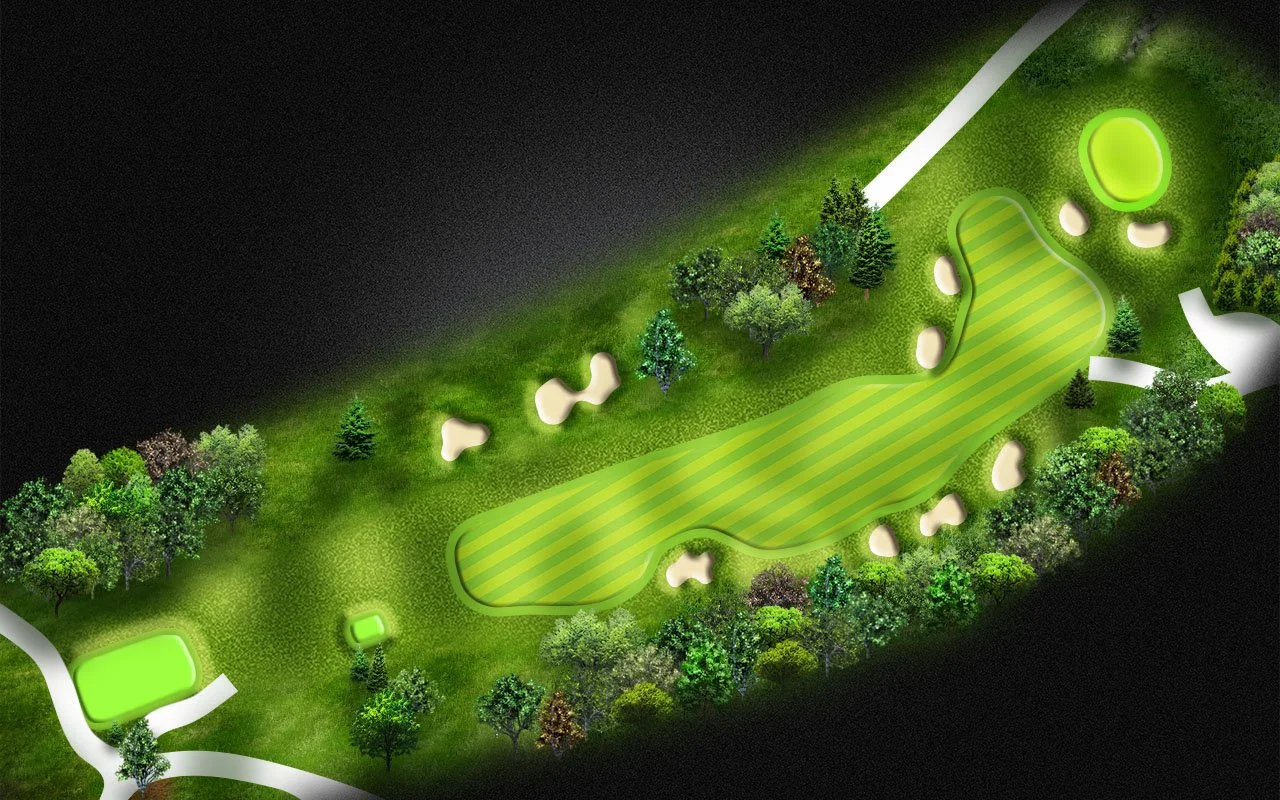
Hole by Hole
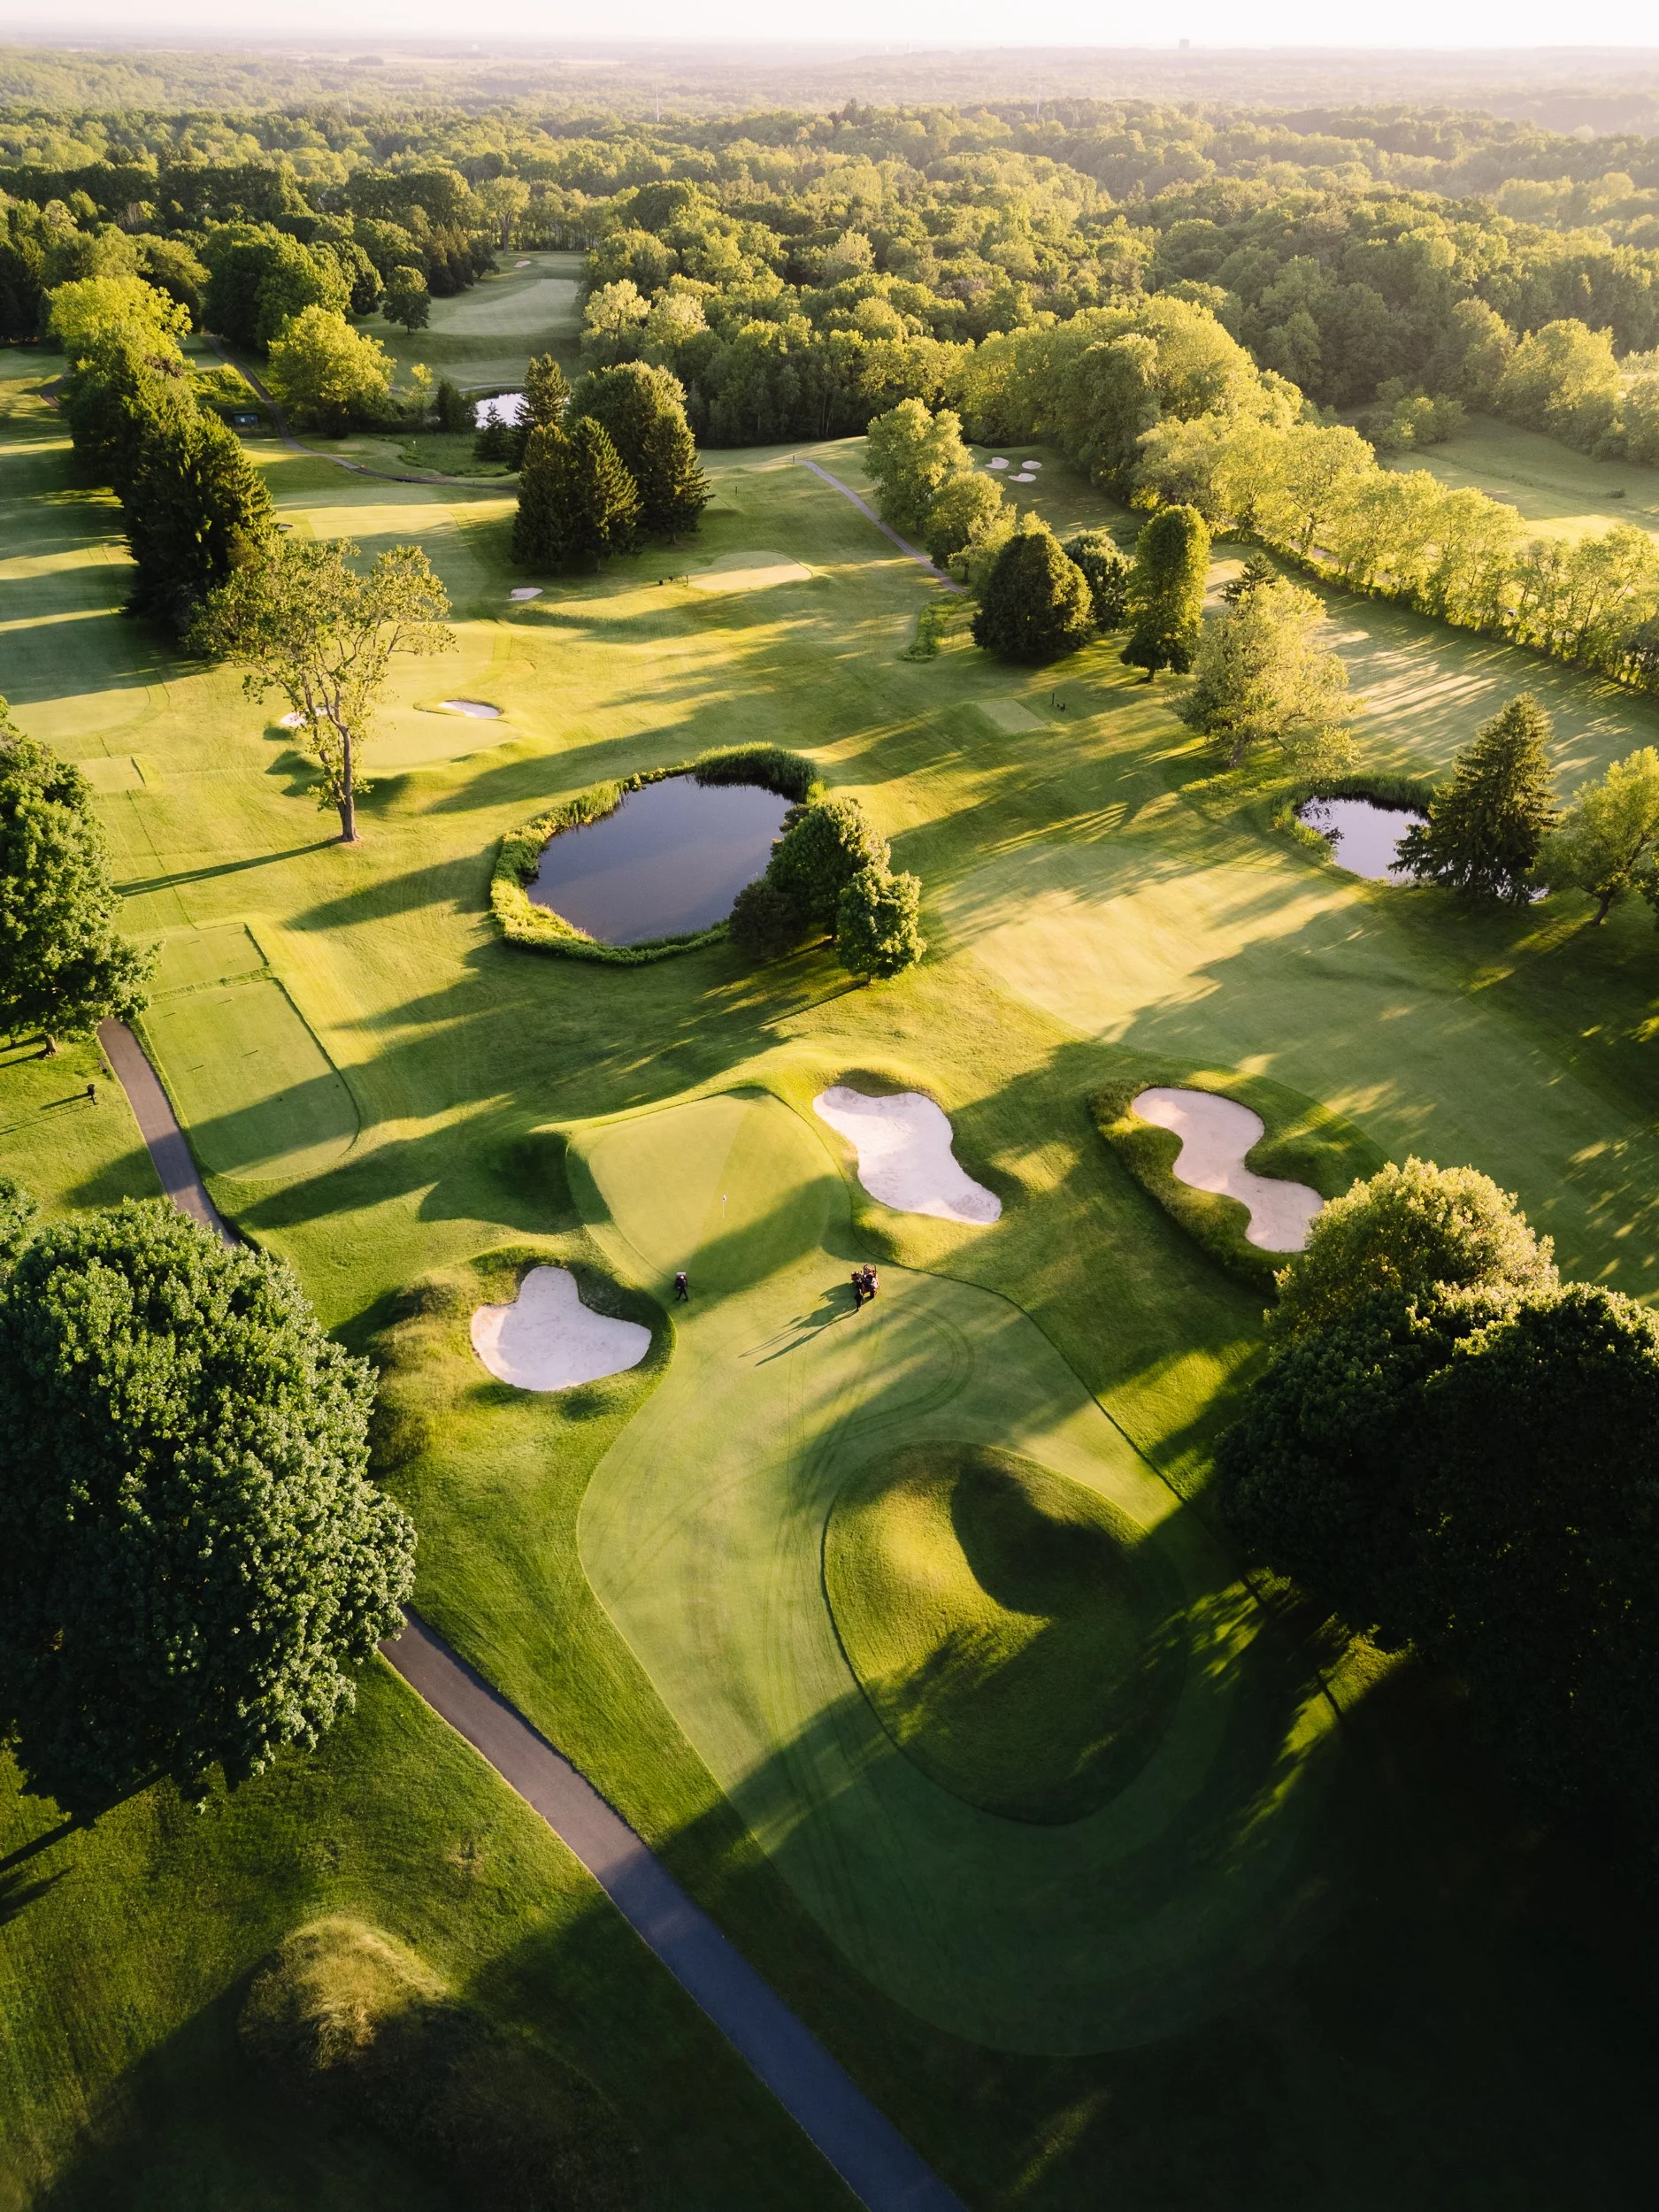
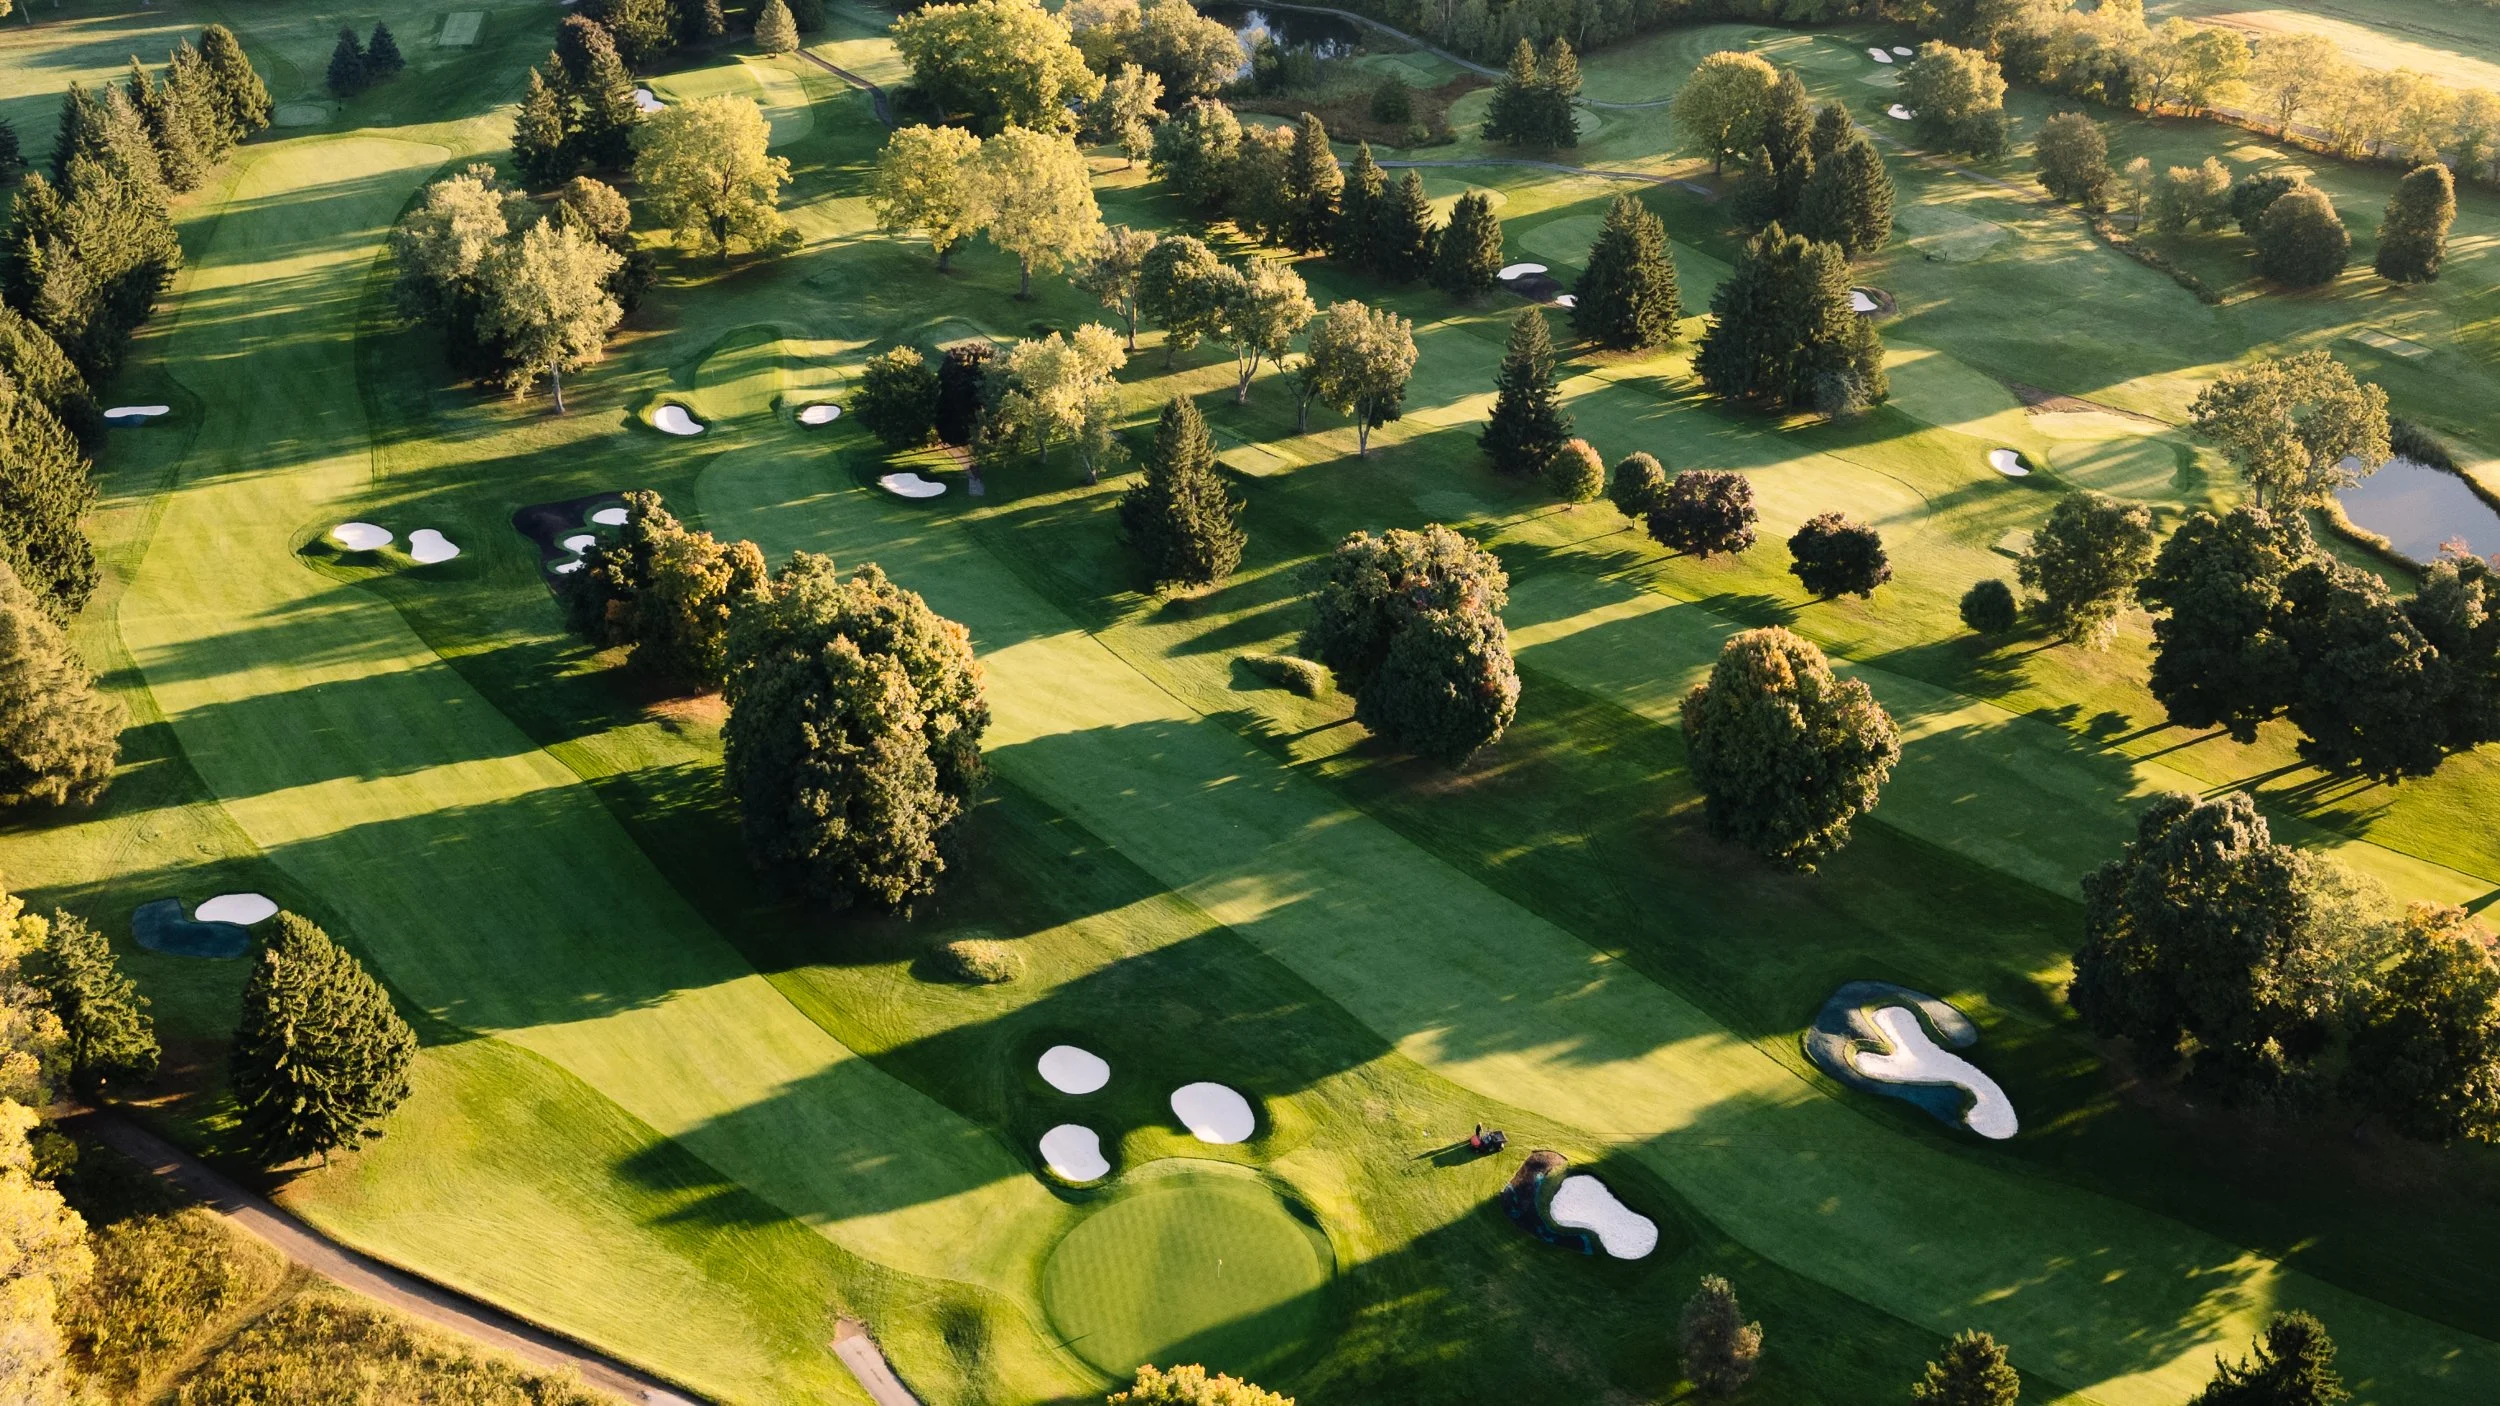
Founded in 1922 and consistently ranked in the top 100 courses in Canada, Lookout Point is one of the best classic golf courses in Canada.
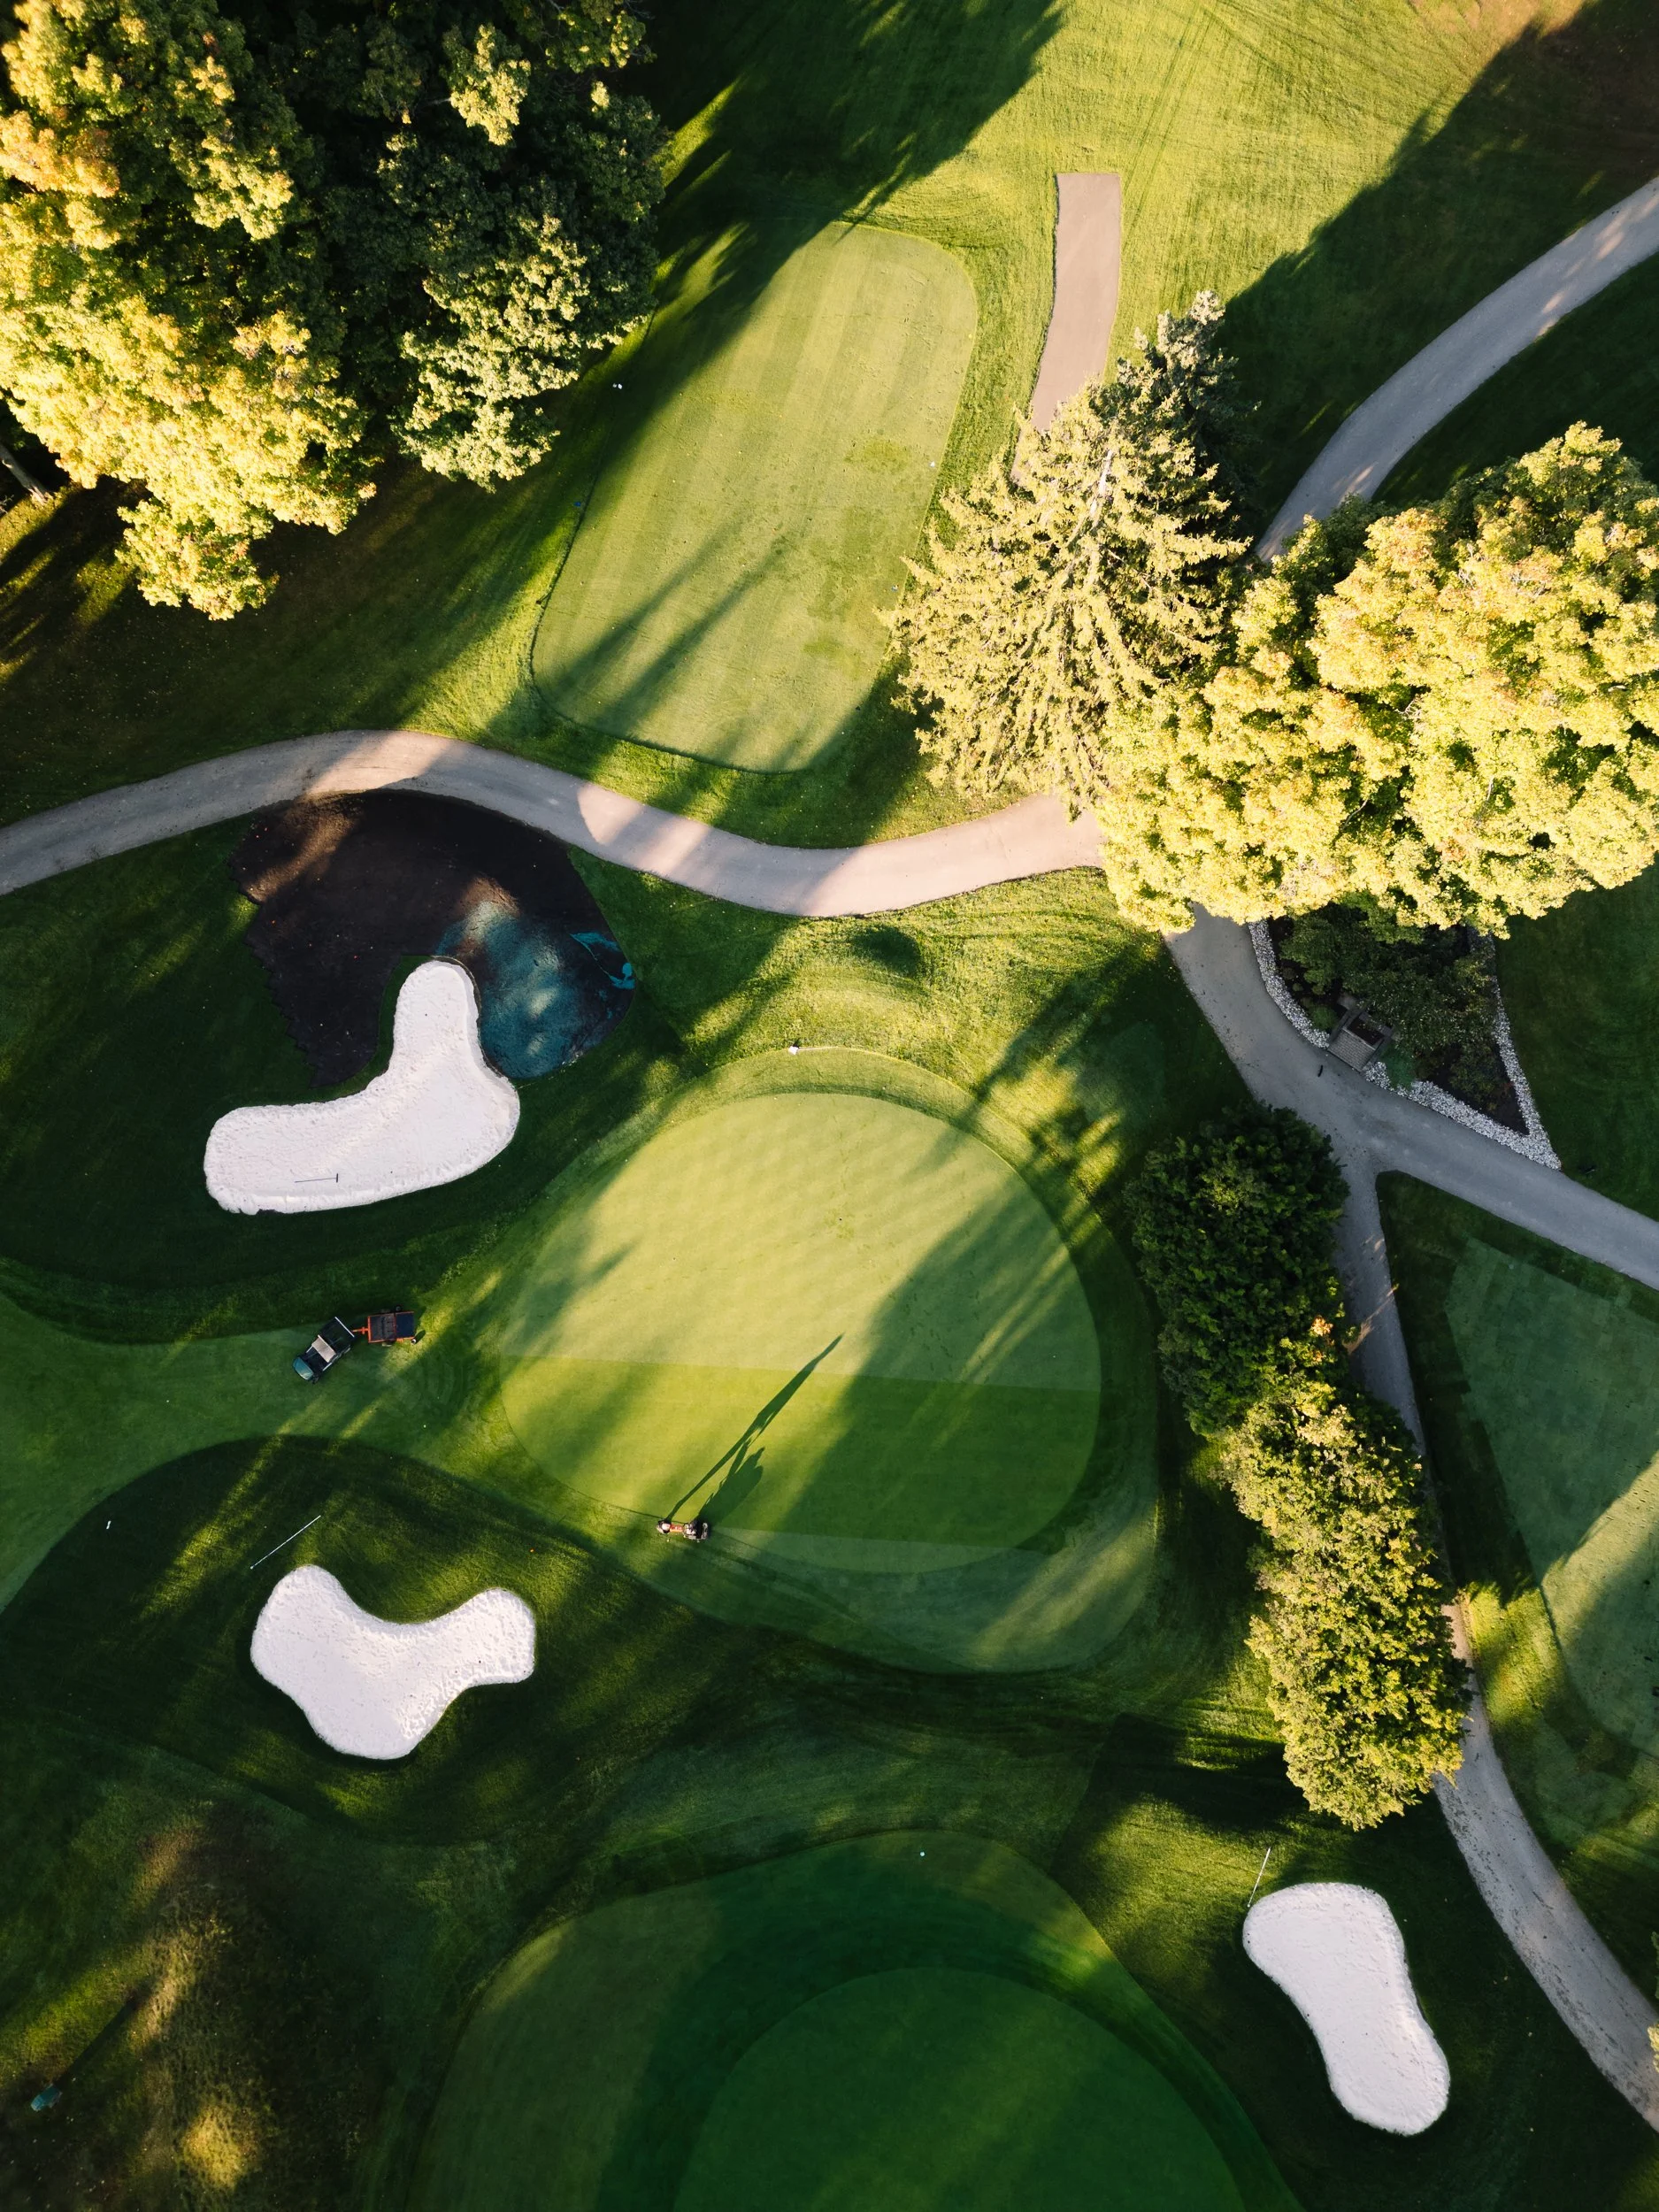
The clubhouse is perched on top of the Niagara Escarpment, and the private club is known for its beautiful setting and spectacular view across the opening holes and the Niagara Peninsula.
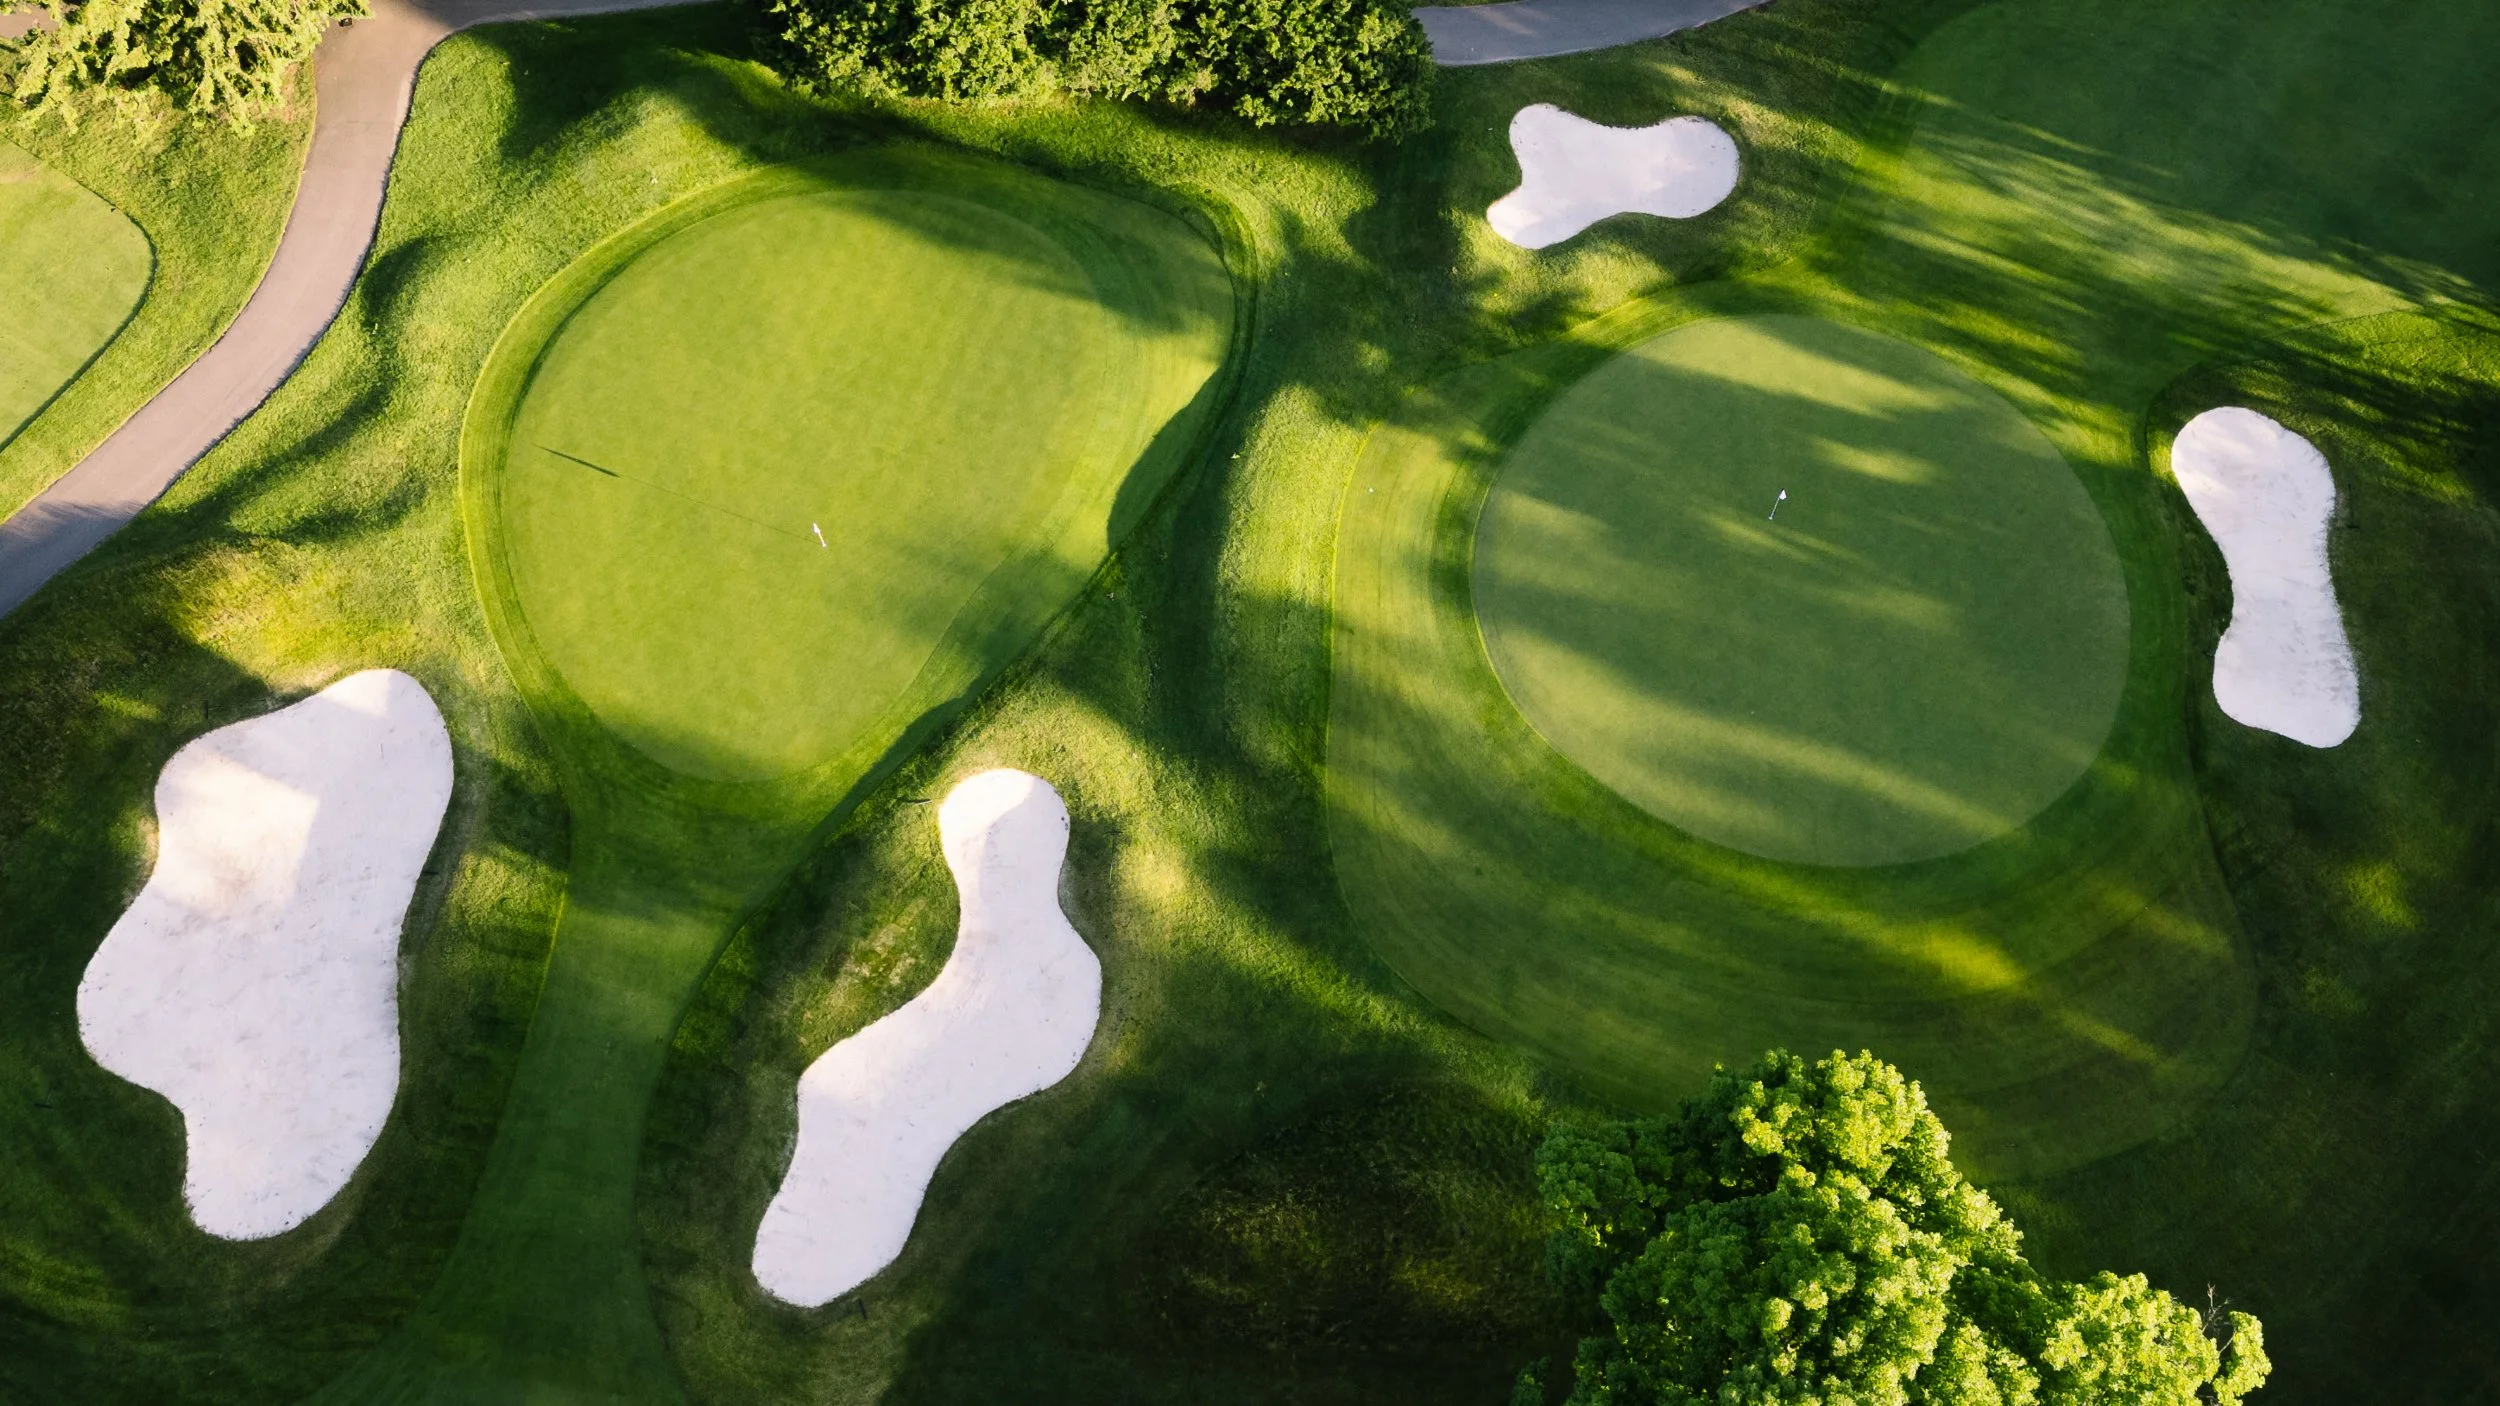
In 2024, Lookout Point replaced the bunkers and surrounding mounds with the Billy Bunker System with spectacular results. Currently, the club is working on a tree management program to improve the turf and playing conditions.
From the hilltop patio, members and their guests can enjoy a refreshing beverage or meal as they watch players start their rounds on the first tee deck and finish their rounds on the challenging 18th green that is wedged into the side of the escarpment below the clubhouse.
Some course images and descriptions currently shown do not yet reflect recent offseason improvements. Updated visuals and course information are being prepared and will be added soon.
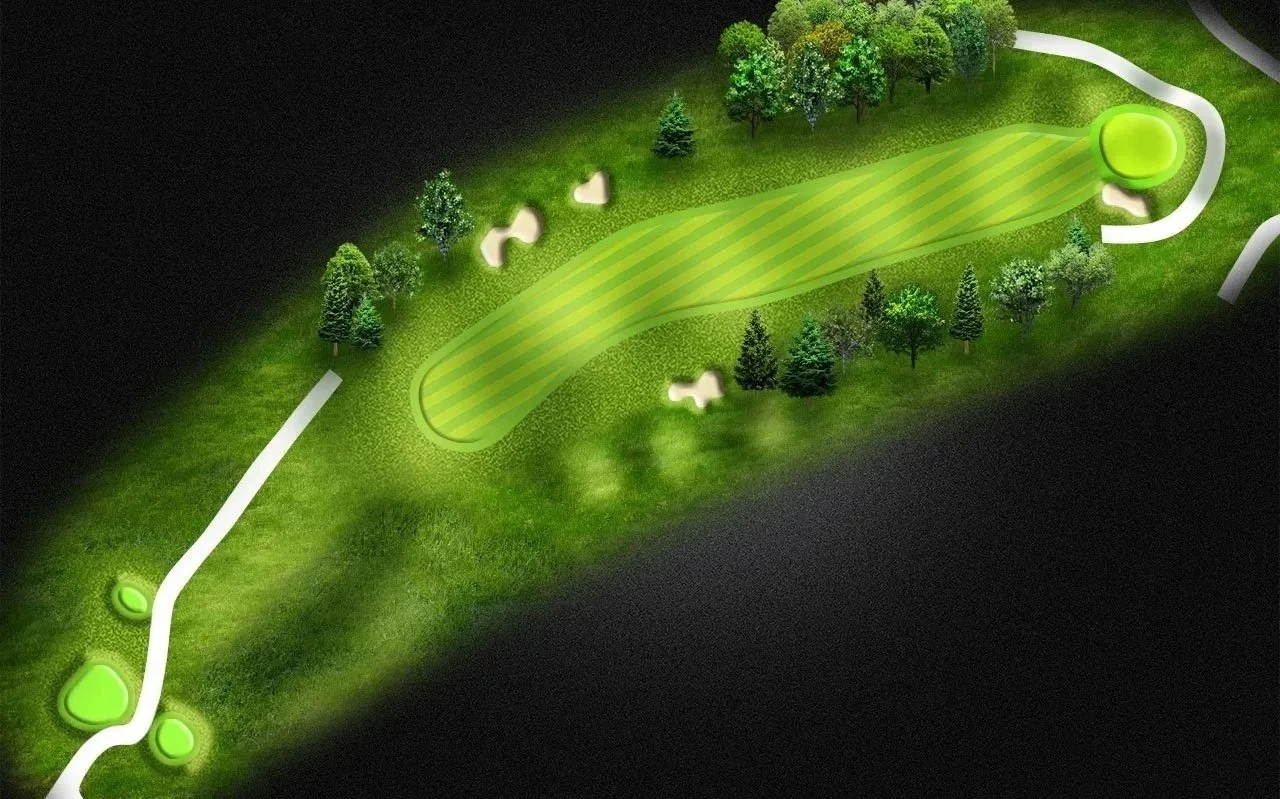
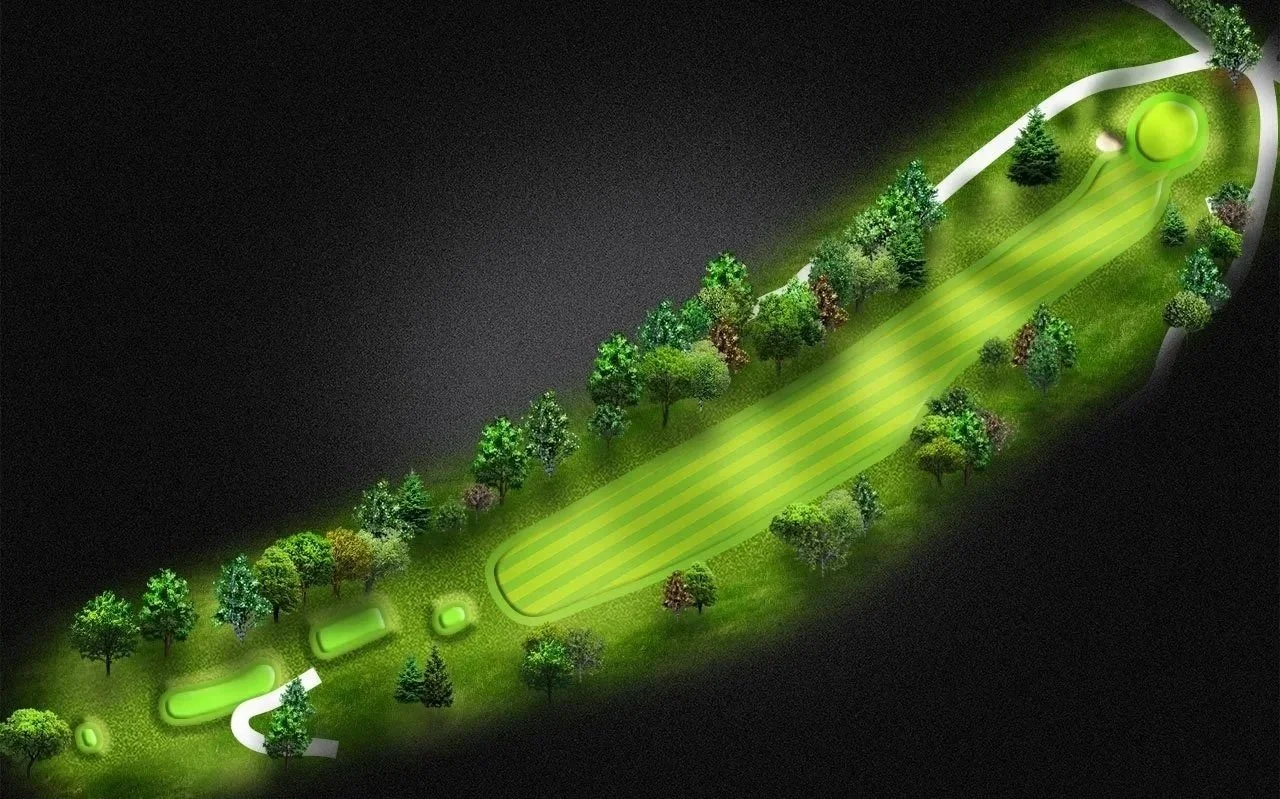
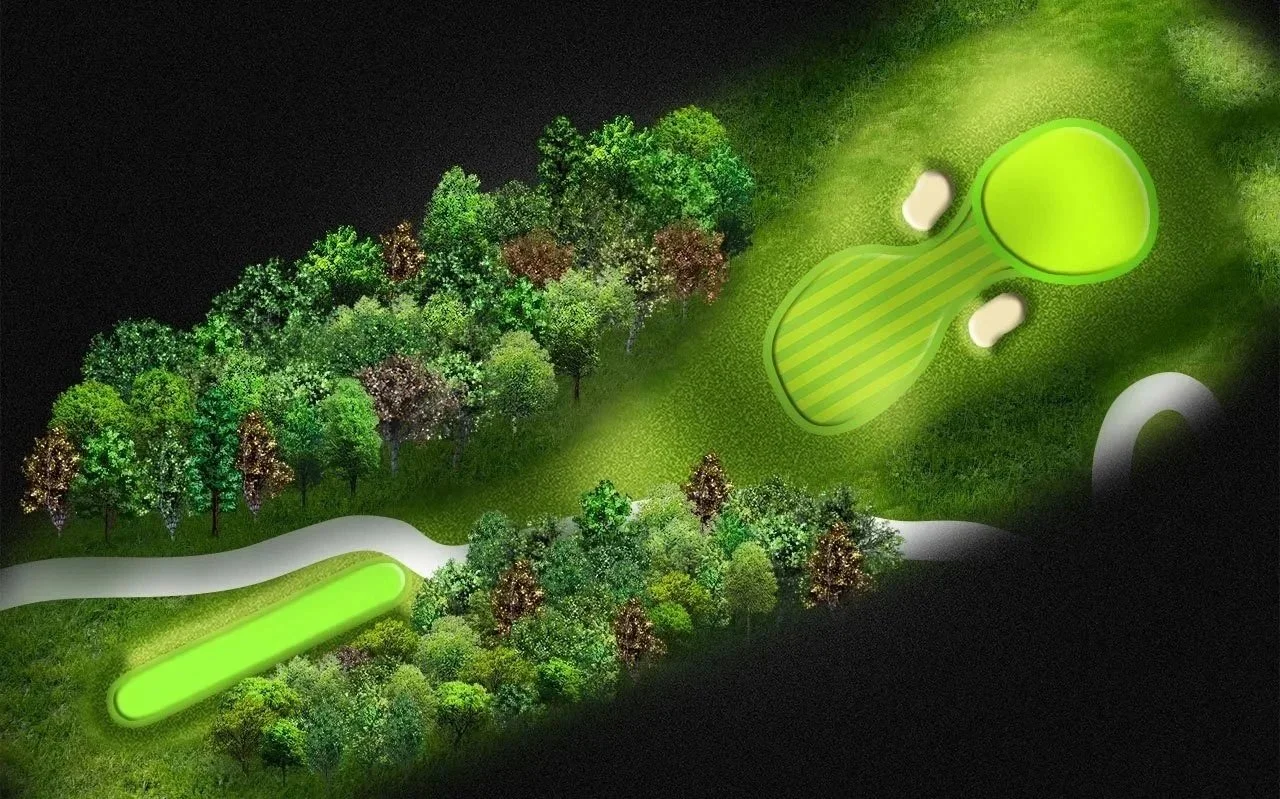
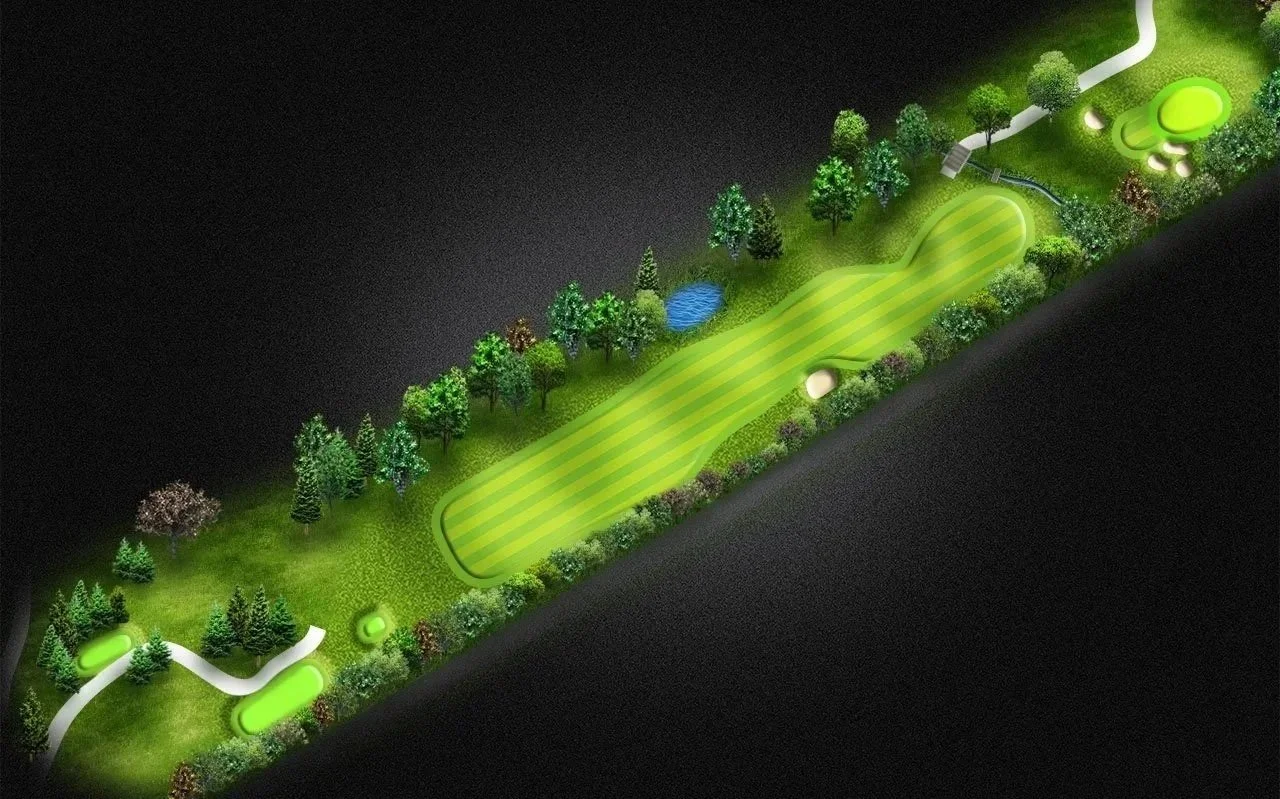
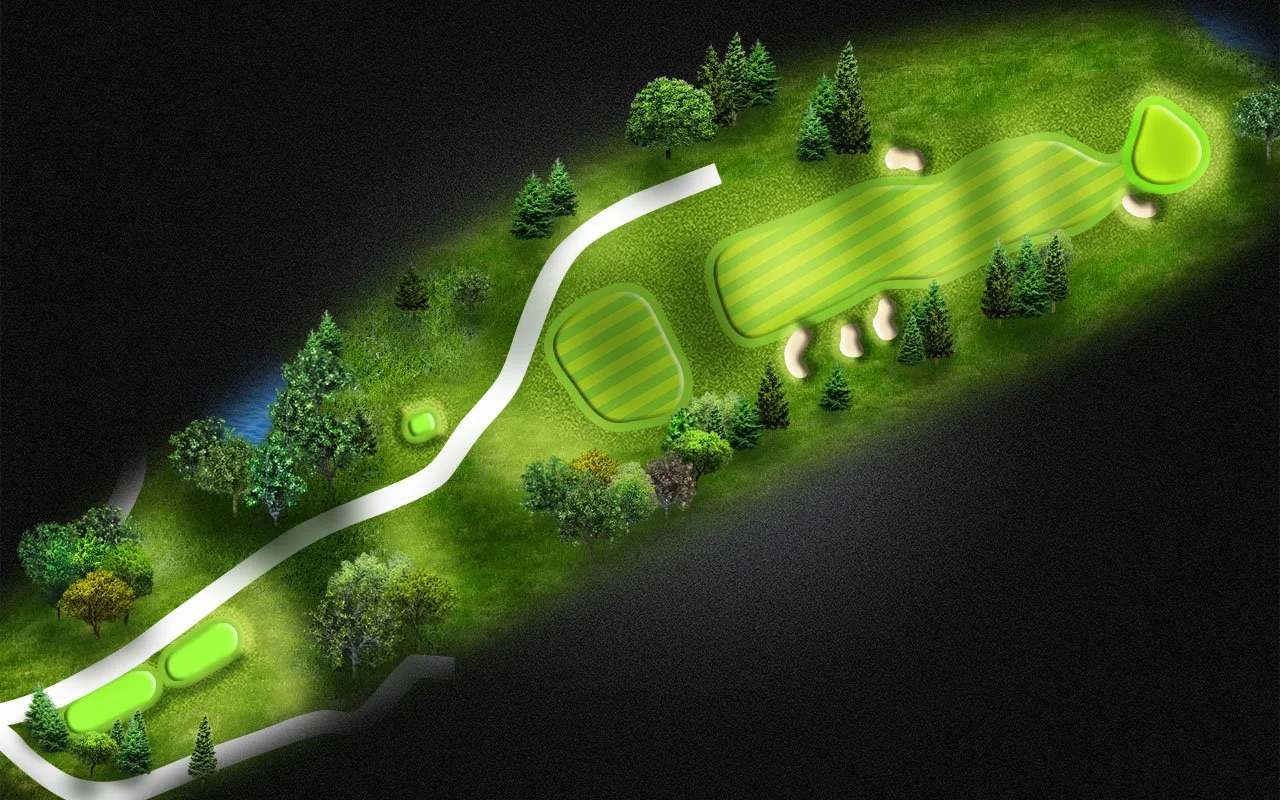
Hole #1 - Par 4 - 418 Yards
The first hole at Lookout Point is ranked the “best opening hole in Ontario”.
The tee box is located on one of the most elevated points of the Niagara Escarpment and provides a spectacular view across Niagara and the first green, which is 130 feet below. The first fairway is tree-lined on both sides with a slight dogleg to the right and provides a fairly generous landing area between two fairway bunkers. A good drive to the fairway will leave a mid-iron or wedge to the large green protected by two bunkers. There is more room on the left side of the fairway where an errant drive can be played from the trees, with the possibility of hitting the green. A drive that lands in the trees and Travis' signature mounds on the right will most likely require a punch shot back to the fairway.
To the untrained eye, from the fairway, the green appears to be at the same level but is actually lower than the fairway. It’s worth considering playing one club less to the front right side, which will bounce and roll to the middle of the green. A ball that hits the false front on the left will probably stop short. The green looks flat, but actually slopes to the front of the green, back into the escarpment. Welcome to Lookout Point! When you walk off the green, look back for a great view of the first hole and clubhouse on top of the escarpment.
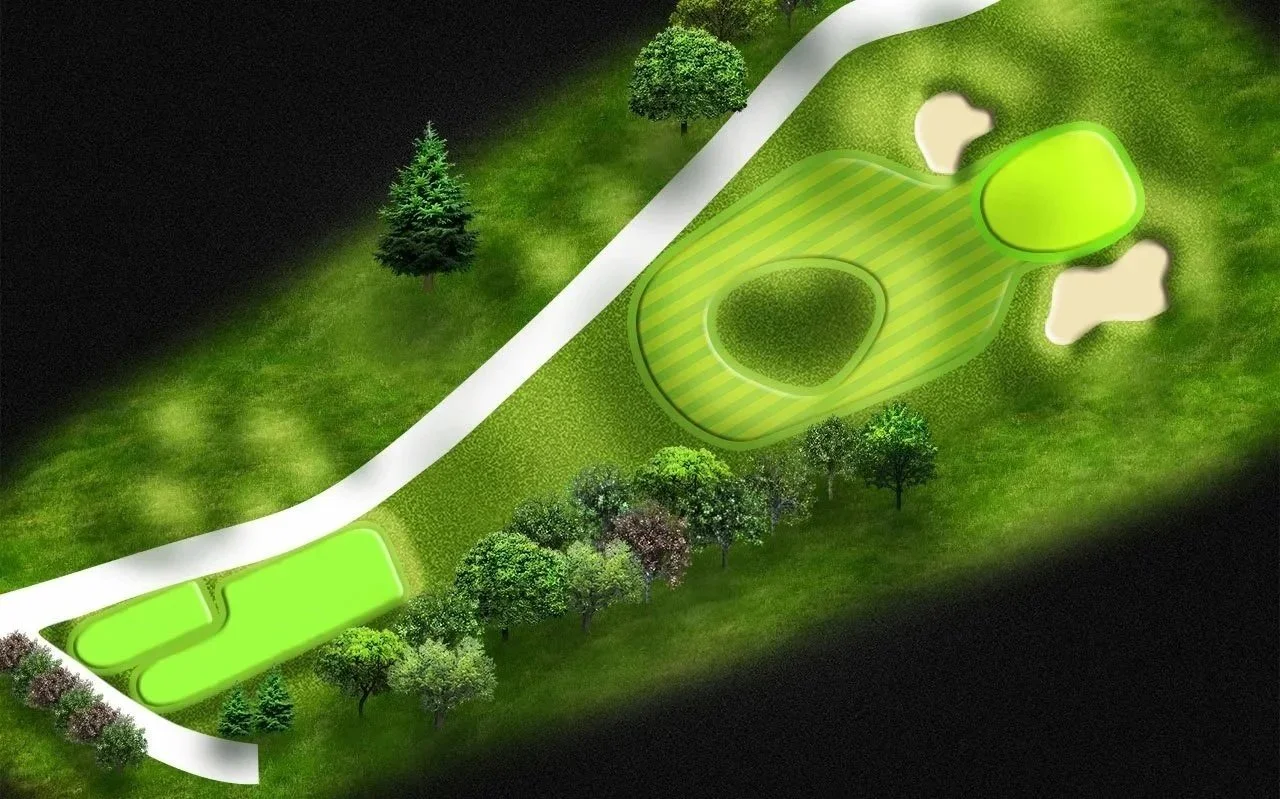
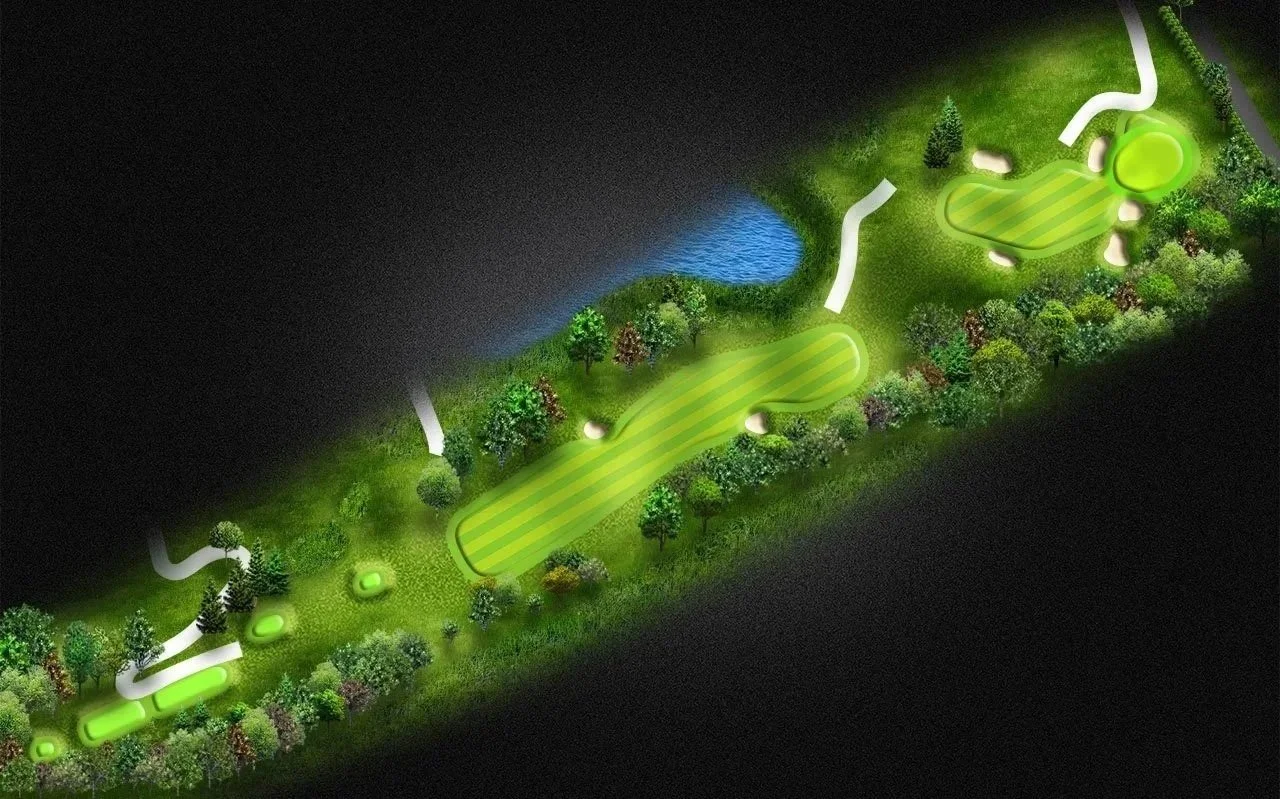
Hole #2 - Par 3 - 174 Yards
The 2nd hole is a 174-yard par 3. Depending on the tees being played, it’s a mid-iron shot for most players; the target is the middle of the green and will leave no more than a 20-foot putt.
Take a look at the direction of the flag on the first hole and at the clubhouse, as the wind can be deceiving. A tee shot that is short centre is a good miss. Two large bunkers protect the front of the green, mounds on the left, a swale on the right, and bushes behind the green make it a challenge to get up and down to save par.
The two-tiered green slopes from left to right across the centre of the green; putts will generally break away from the escarpment on this hole. Gord McGinnis Sr., long-term pro, advised many golfers to follow his example and simply play the middle of the green on every hole. Don't chase the pins. If you follow this strategy, you will walk away with an easy par.

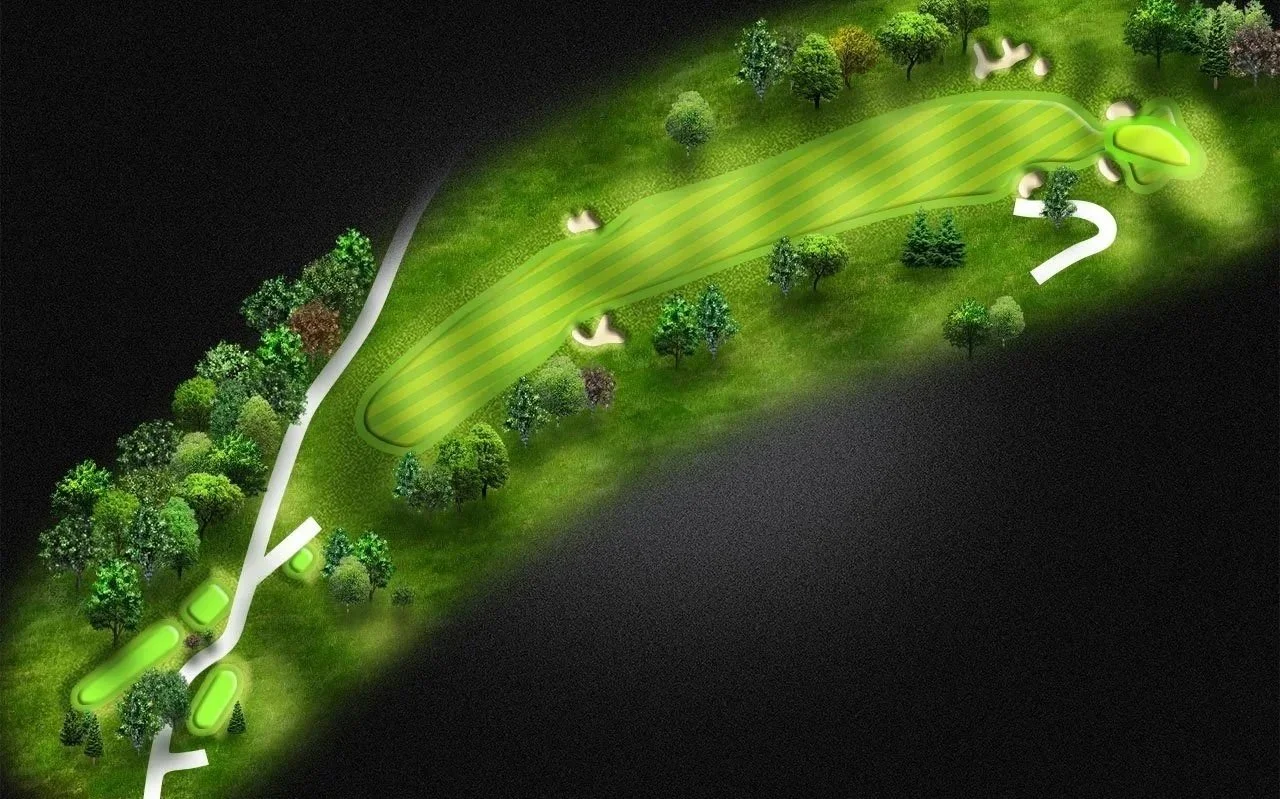
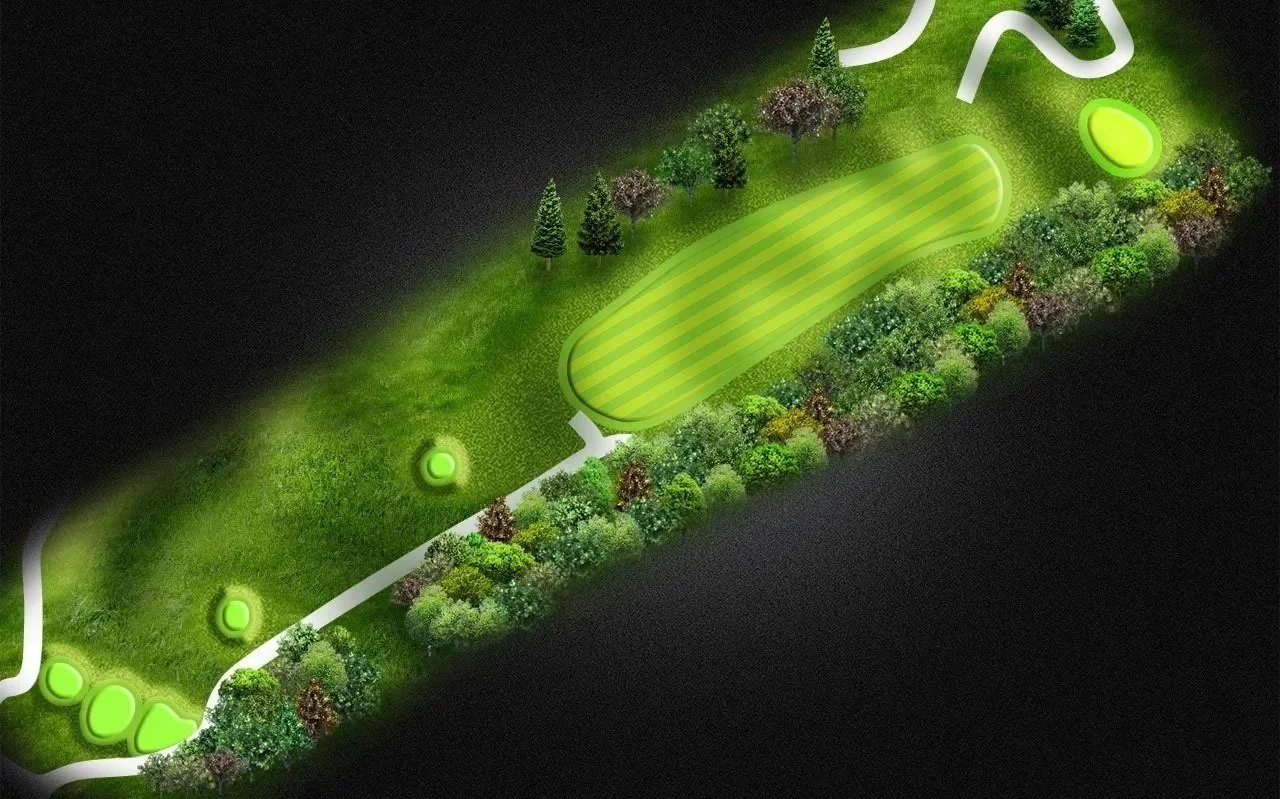
Hole 3 - Par 5 - 484 Yards
Hole #3 at Lookout Point is a memorable and reachable par 5 where the escarpment really begins to take effect.
Players must favour the left-hand side of the fairway, as most drives will land and kick to the right due to the left-to-right slope. A good tee shot will split the two fairway bunkers and give the player the option to go for the green in two, and an eagle putt. But don’t be long or right of this green, because this hole will penalize the aggressive golfer. More birdies are made on this hole by laying up, favouring the left side of the fairway or short front, which will provide the best angle to attack the pin. The green is protected by swale mounds and two bunkers that reduce the odds for an easy par.
Once on this long, narrow green, players will be required to figure out what is uphill, downhill, and sidehill. Seeing is not always believing on this green!
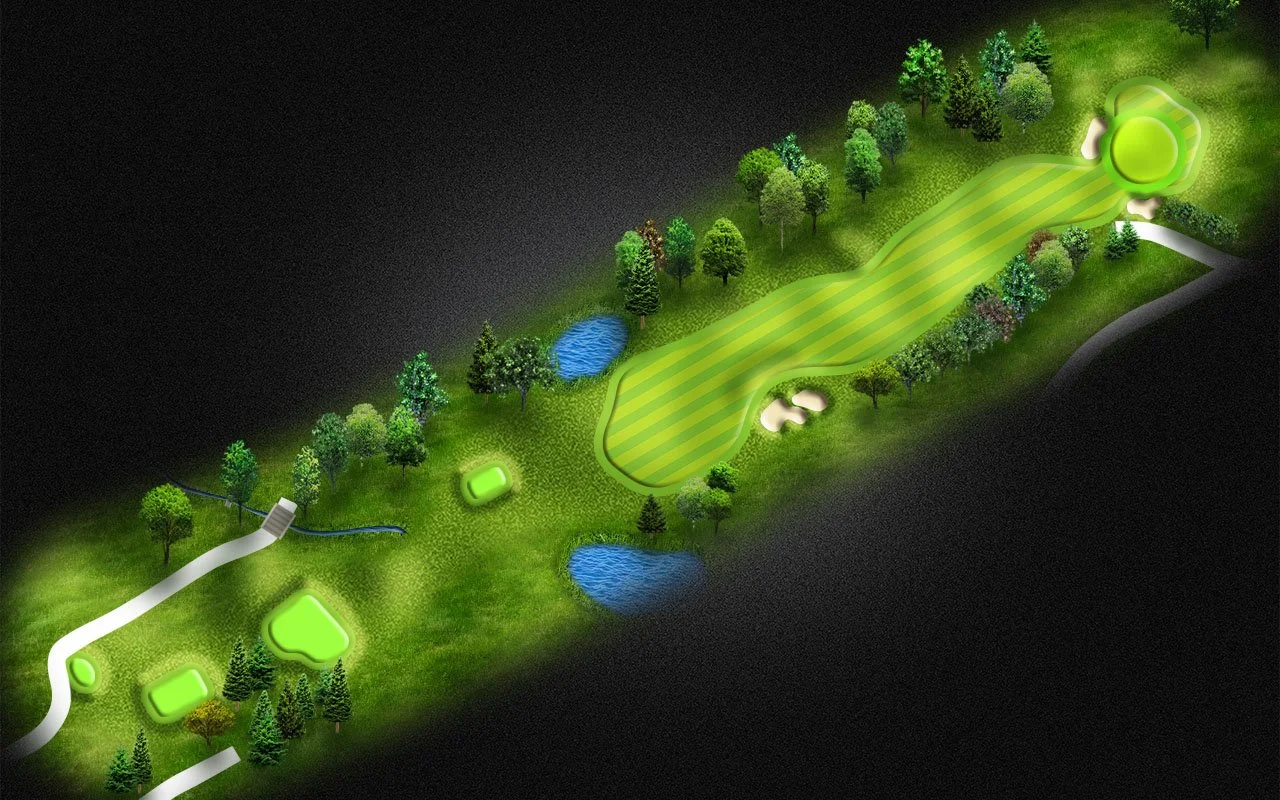
Hole 4 - Par 4 - 465 Yards
The 465-yard 4th hole at Lookout Point is the longest par 4 on the course.
This hole plays uphill tee-to-green and is a slight dog-leg right to left. The tee shot should favour the right side of the fairway and will kick slightly left. The second shot will be a long iron from an undulating landing area and should also favour a line to the right side of the green. Everything kicks left on this hole. Don’t miss long or left, short and right is an easier up and down.
The green complex is surrounded by Travis mounding and a single bunker on the left side, making it difficult to save par. The green slopes right to left away from the escarpment, be satisfied with a two-putt on this large green, and head for the next hole.
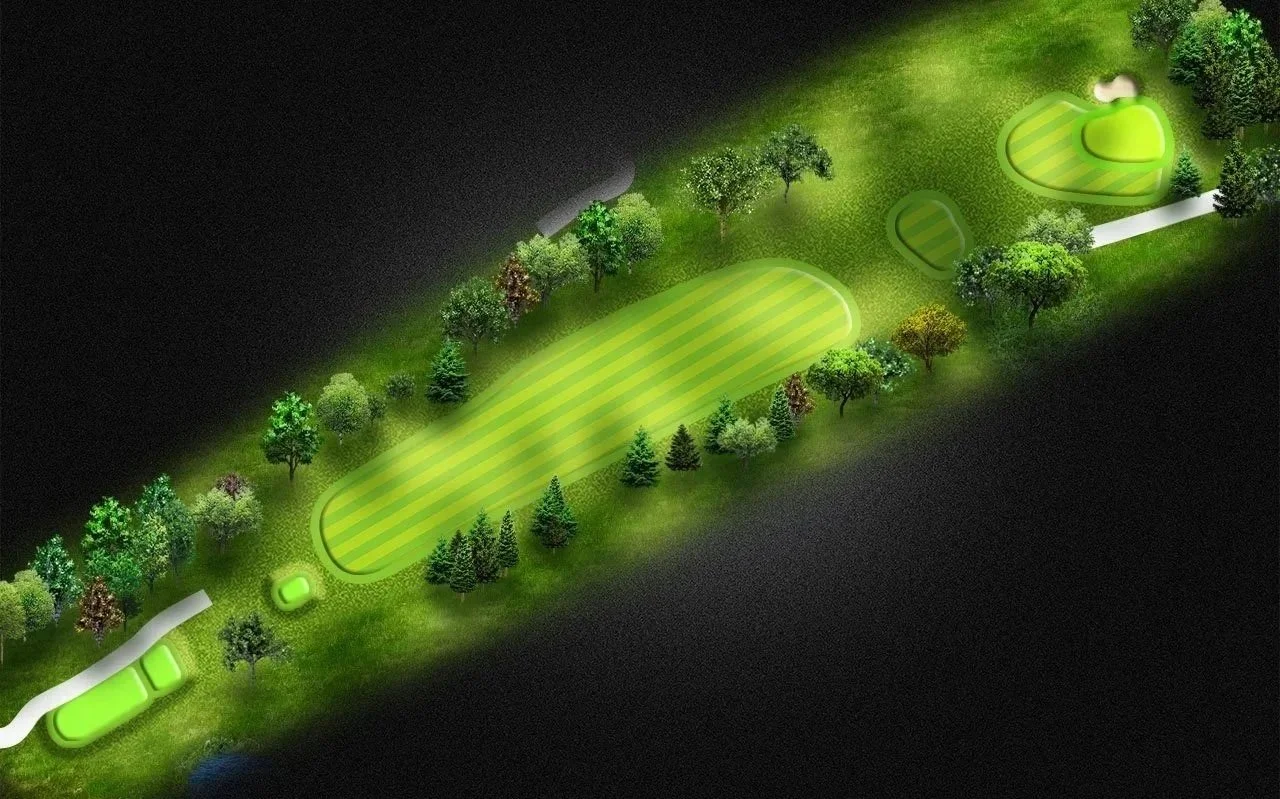
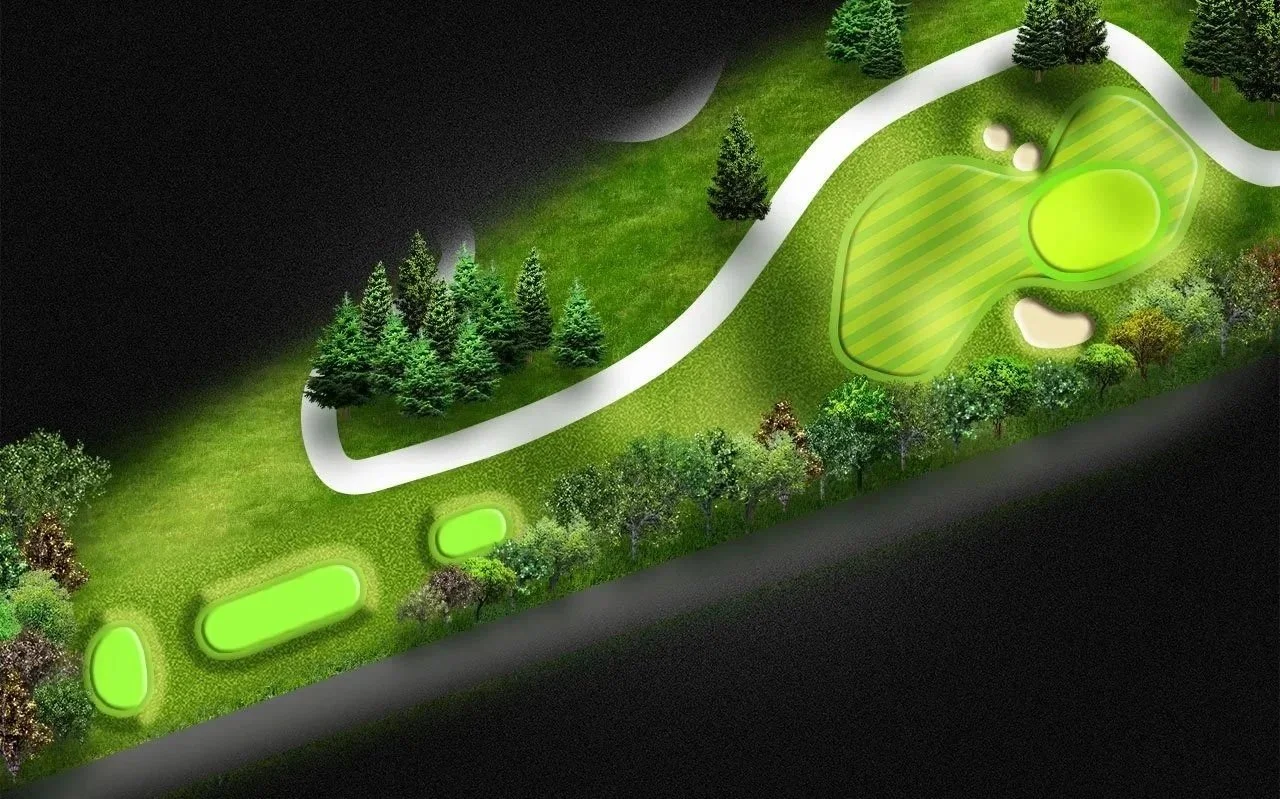
Hole 5 - Par 3 - 158 Yards
The 5th hole is a short par 3 that plays shorter than the yardage indicates. But don’t be fooled by this picturesque little hole that is ranked as one of the easiest holes on the course. Off the tee, this hole demands a straight shot that lands on the front middle of the green; the reward is a short but tricky birdie opportunity. With the wind blowing, this is a tough green to hit. Two bunkers left and right, and a large drop off at the back make for a difficult par save. Be warned: this short par 3 frequently punishes all errant shots that miss the green with a double bogey.
Long and right is jail, left is tough, the only good miss is short front of the green, which occasionally rolls onto the green. Even the good players play short, especially when the wind blows.
Hole 6 - Par 4 - 396 Yards
The par 4 6th hole measures 396 yards and requires two accurate shots.
Accuracy is more important than distance off the tee on this hole. A good drive can roll onto the top shelf of the fairway, leaving a wedge to the green, or roll into the valley and the downhill slope. An accurate 3-wood or hybrid that lands on the left side of the fairway is advisable, which will roll into a collection area at the 150-year marker. The second shot is a blind shot, mid-iron to the green over a large valley. This two-tier green has a Travis signature design feature: a deep valley that runs across the centre of the green that emulates the fairway. The pin placement front, centre, and back will require different types of approach shots.
Players are advised to play the centre of the green, or short and right. Avoid going over the back of this green at all costs, which is a most challenging up and down. Centre pin placements are the easiest to get close to, and a back-pin placement requires an accurate and high approach shot that sticks and holds, or rolls up the slope. The best advice is to play for the middle of the green and escape with a par—you will feel like you made a birdie!
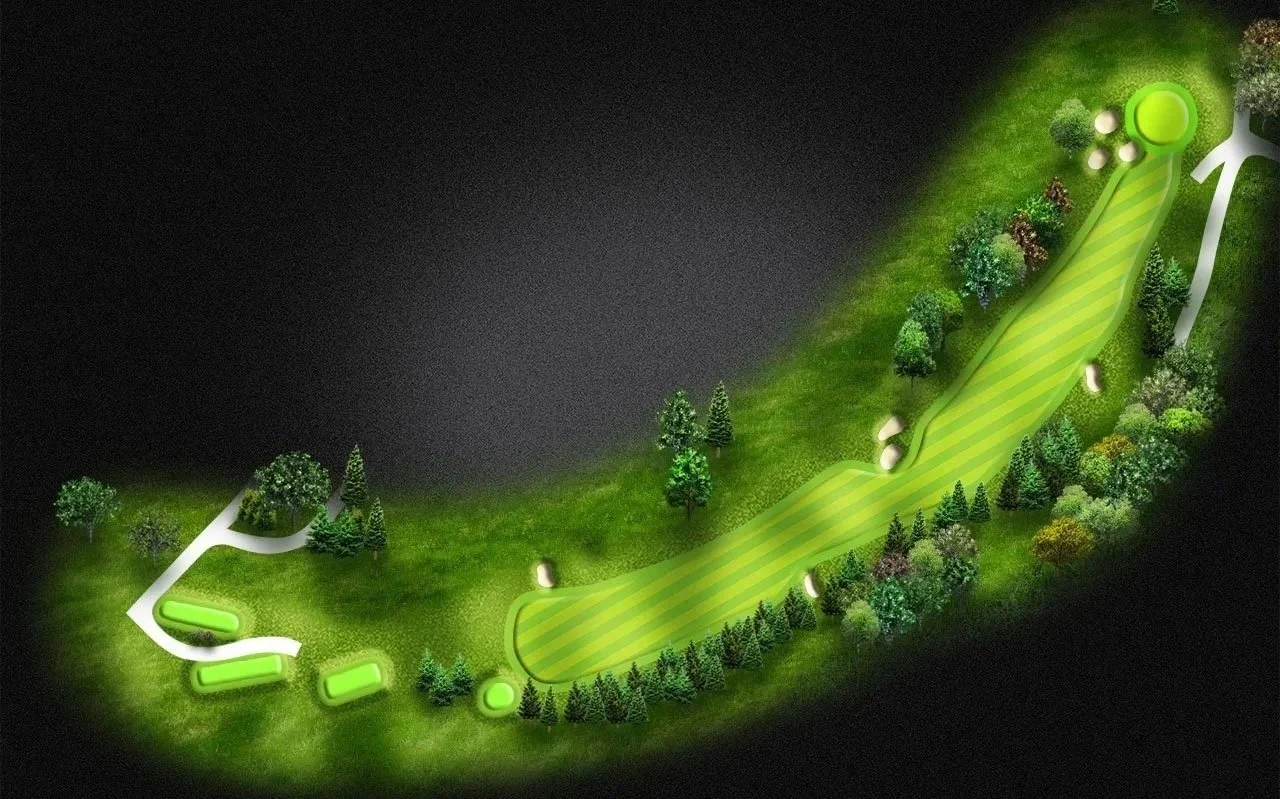
Hole 7 - Par 5 - 523 Yards
The 7th hole is a beautiful 523-yard par 5 dogleg left that goes up and across the side of the escarpment.
Trees line both sides of the fairway. The ideal tee shot favours the centre of the fairway, enabling longer players to challenge this green in two. An ideal target for the second shot is to the right of the 100-yard marker. Staying on the high right side of this fairway provides a good angle into this very tricky green. Don’t miss long or left.
Even the seasoned veteran at Lookout Point still has difficulty reading this green. Two putts on this challenging green that slopes predominantly, back to front and right to left, is nothing short of a victory. “I didn’t see that”, is not an uncommon statement on the 7th green!
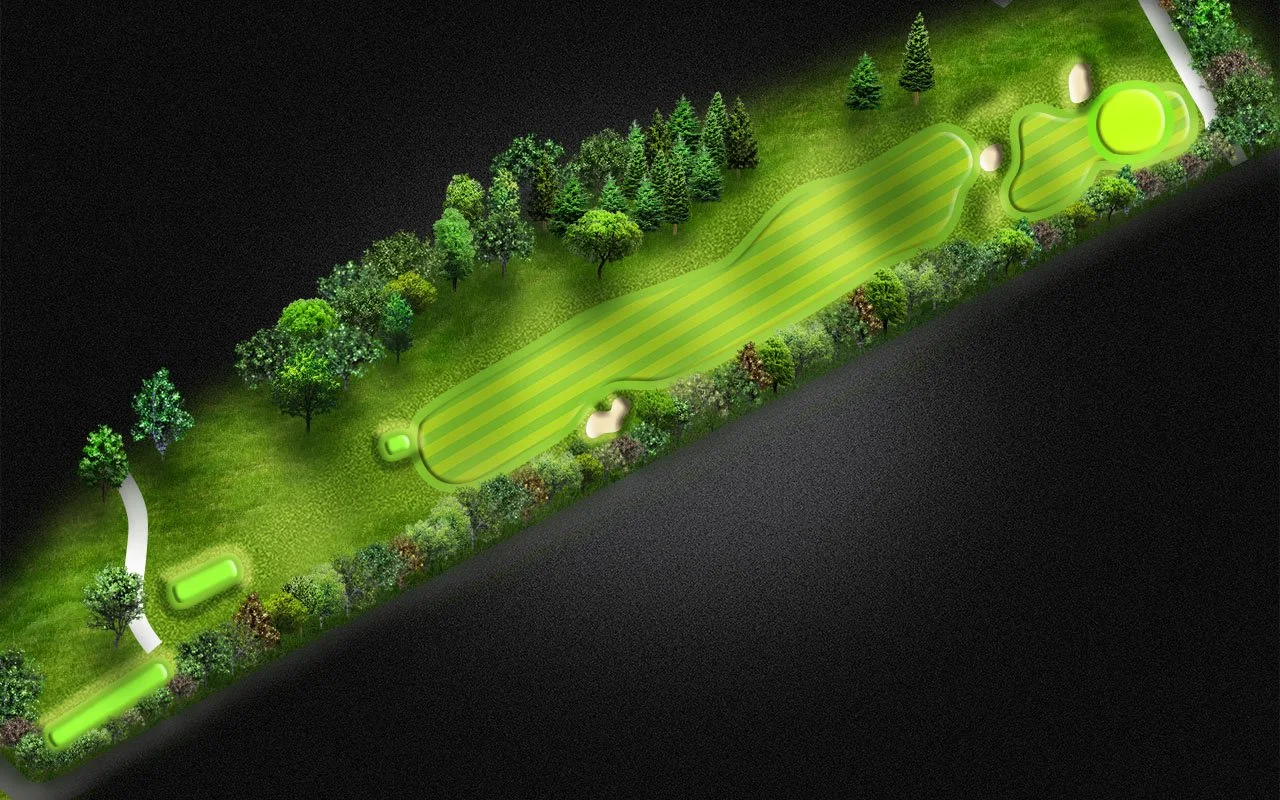
Hole 8 - Par 3 - 175 Yards
The 8th hole is the last par 3 of the front nine.
The tee shot is 175 yards uphill through a valley known as Presbyterian Pass. Wind direction and elevation on this hole is a big factor in club selection, which can play two to three clubs longer than the yardage advertised on the scorecard.
Correct club selection is the key to success to land on this large green. Any tee shots that are just short will roll back 10-15 feet below the green or land in one of the two bunkers that protect the green. There is a relatively flat landing area to the left of the green that can’t be seen from the tee box. Avoid the deep rough and slope to the right. This hole has one of the largest putting areas on the course, which looks flat but actually slopes back-to-front down the Niagara escarpment.
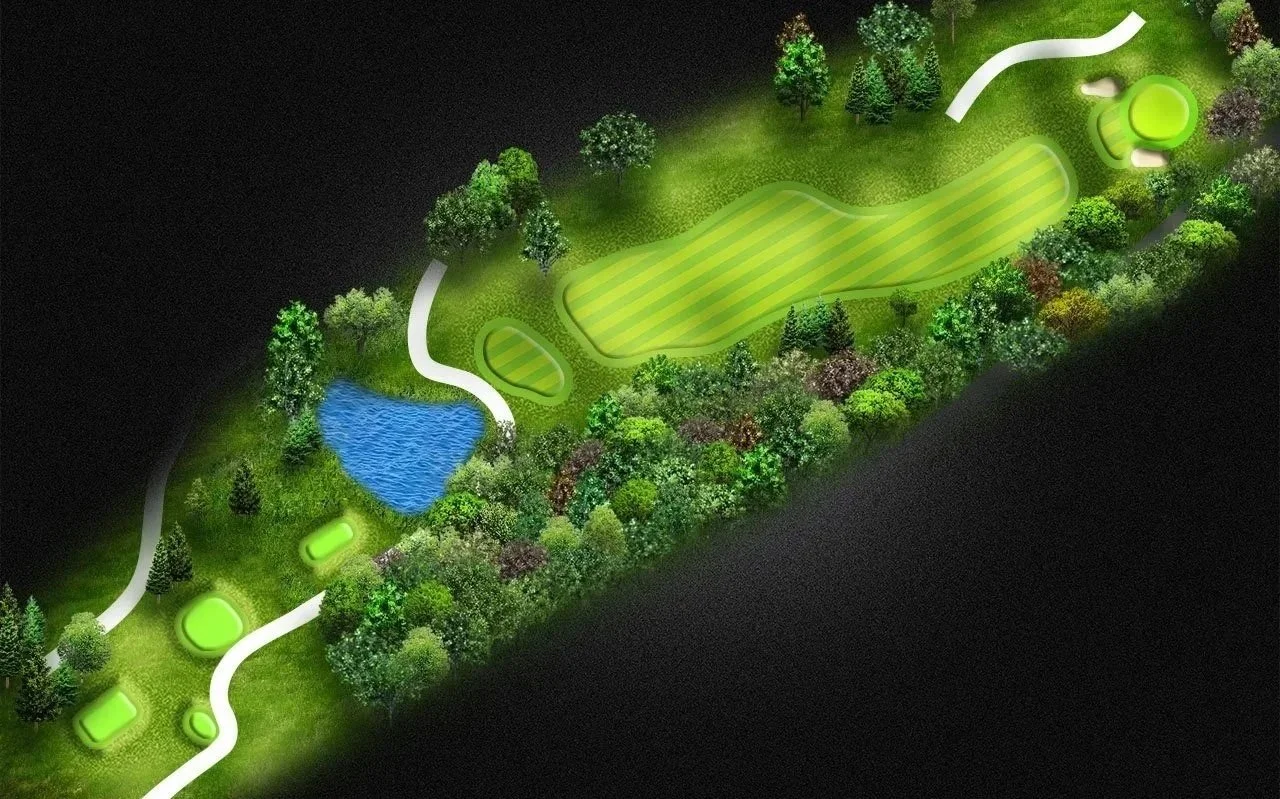
Hole 9 - Par 5 - 522 Yards
The 9th hole at Lookout Point is the only hole on the course that is on the top of the escarpment.
For the longer players, the 9th hole is a reachable 522-yard par 5. A demanding tee shot, out of bounds on the right side, and a large pond to the left will catch bad drives. Choose your second shot wisely—it might be a good idea to lay up to the 150-yard mark to avoid the deep valley that leaves a difficult blind third shot. Longer players who attempt to carry the valley that crosses this wide fairway should favour the left side of the fairway because it is a shorter carry, and you will avoid the two bunkers on top of the valley.
The 9th has one of the largest greens at Lookout Point, guarded by bunkers left and right and a runoff area to the left. The green slopes heavily back to front, more than it seems. When putting back-to-front, the ball will start to accelerate down and away from the hole.
Hole 10 - Par 4 - 427 Yards
Take a few moments on the 10th tee to take in the spectacular view across the mature tree canopy and the Niagara Peninsula. The 435-yard par 4 10th hole is one of the most demanding tee shots you will face during your round. With out-of-bounds from tee to green for the next five holes, this is the start of Lookout Point’s Amen Corner. With out-of-bounds on the right side, and a heavy tree-line left, a good tee shot is required to keep the ball in play and positioned for a mid-iron approach across a deep gully in front of the elevated green. Missing the green means a challenging up and down. Don’t be long and don’t be left, it is better to be slightly short than long.
The green is wider than it is deep and slopes right to left, back to front, more than you think. All golfers will be satisfied with a par when leaving this green!
Hole 11 - Par 3 - 195 Yards
The challenging 11th hole is the only par 3 on the back nine, playing 195 yards from the back tee.
With out-of-bounds on the right, this tee shot requires your best swings of the day. Due to the elevation change, use one club less than the yardage requires. Take a look at the flag on top of the hill and then the other greens—it’s not unusual to see the flags in this area of the course all going in different directions. The green, which falls off in every direction, is protected by two bunkers on the left and two bunkers on the right, and a gully in front. If the pin is at the back of the green, there is a runoff area waiting for the aggressive player who rolls off the back, which is not an easy up and down.
Playing as the toughest par 3 on the course, this hole demands accuracy to make par or a wicked short game. Making a birdie here will give you honours on the next tee.
Hole 12 - Par 5 - 501 Yards
The 12th hole is the last par 5 at Lookout Point, out-of-bounds on the right side tee-to-green.
However, it’s a reachable hole for long hitters and an opportunity at birdie before finishing the round with six par 4s. This hole has an inviting fairway that is slightly downhill and usually downwind. The fairway landing area is protected by a lone fairway bunker well placed on the right and a small hidden pond on the left. A good tee shot lands right of he pond and kick right and forward. This provides two options. The conservative 140-yard lay up, leaving 110 yards to the pin. The correct yardage is key on the layup—you must be short of the hidden creek, which is 90 yards short of the green. The second option is a 200-yard carry to clear the creek and have a chance to reach the green.
A common theme at Lookout Point is just short is good, don’t be long or right on this hole. This larger green is protected by mounding on the left and three bunkers on the right. Long is a severe slope down and into the trees; the putting surface looks relatively flat but slopes left to right away from the clubhouse and escarpment.
Hole 13 - Par 4 - 443 Yards
The 453-yard par 4 13th hole is one of the most picturesque holes on the course, and also one of the hardest holes to par.
Travis, who built the course in 1922, used the natural features of the land. Your tee shot must carry a large spring-fed pond and reach the top of an elevated fairway. There are trees on the right and a valley on the left side of the fairway. A long and accurate drive that holds the right side will cut the corner. If the ball lands on the right side of the fairway, it will leave the shortest approach shot with the best angle to the green. This hole’s rambling fairway has several gullies left and another in front of the green.
Your approach shot is to one of the smallest and most difficult greens on the course. Protected by two bunkers, missing left or right still leaves the opportunity for an up and down. Every pin position will challenge even the most seasoned putters!
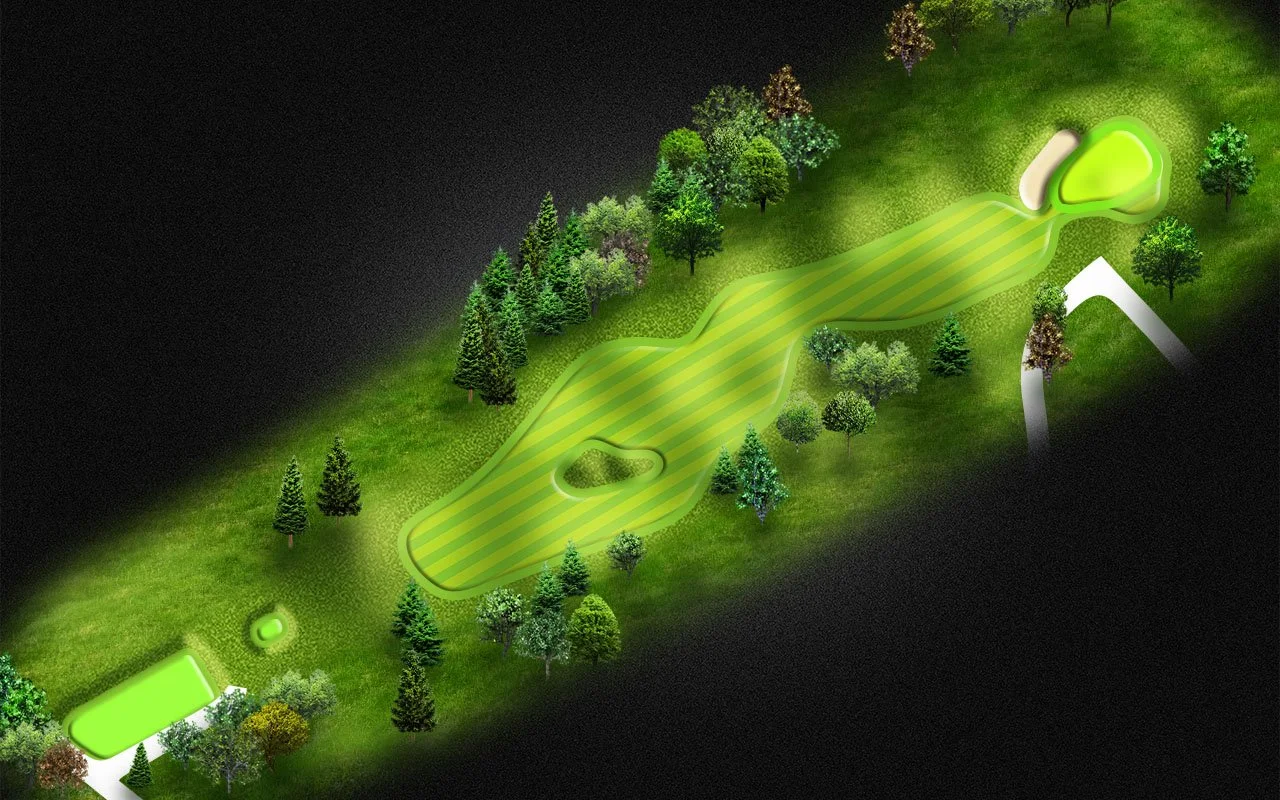
Hole 14 - Par 4 - 423 Yards
The par 4 14th hole plays longer than the advertised 423 yards.
The hole is uphill off the tee, protected by out of bounds down the right-hand side and trees on the left. The hole is tighter and longer than it looks. Play down the left side of the fairway. Your second shot to this green will need to carry a gully, a fairway bunker, and a Travis signature mound, which is 60 yards short of the green.
The green is protected by a deep bunker on the left and mounding to the right. The runoff area at the back of the green will perplex all levels of golfers. There are two options here: putt or chip. We suggest that you play to your strengths, since it’s a tough up and down. The green is relatively large by Lookout standards, and has a gully on the right and a mound at the back. This hole leaves even the most experienced golfer satisfied with par.
Hole 15 - Par 4 - 334 Yards
The 15th hole of the day is a short 334-yard par 4 and is the first hole on the back nine without out of bounds on the right.
The 15th hole has a unique fairway, forcing players to keep the ball left of a solitary sentinel tree on the right side of the fairway. Players can try driving the ball past the tree or place the ball in the valley left of the tree. More birdies will be achieved from this position. The green is protected by a wide bunker that wraps around the front of the green and a runoff area on the right.
Don’t get cute with this short par four. Play to the front right quadrant of the green, approach shots going long or left will visit the green for a short period of time, and a challenging par save. The green is sloped right to left and back to front.
Hole 16 - Par 4 - 334 Yards
The short par 4 16th hole is a tight hole with trees on both sides.
This hole demands accuracy over distance, a 200 to 220-yard tee shot that carries the large gully between the fairway bunkers is rewarded with the ideal position to approach the green with a full iron. The small elevated green is protected by a bunker on the right side, mounding at the back, and a runoff area right and front. Players are advised to carry the false front and play to the middle of the green. Accurate wedge players can be aggressive and go for a birdie. Don’t get too aggressive if the pin is on the left, unless you are very confident with your yardage and club selection.
Although the green appears flat, it actually slopes from back to front. Birdie is more frequent from the fairway than from just short of the green.
Hole 17 - Par 4 - 418 Yards
The 420-yard par 4 17th is one of the more open holes on the course, long and wide with a large green.
All warmed up and swinging well, this is your chance to tee it high and let it fly. A tee shot that lands right of the Walter Travis mound leaves a good angle to the green. There is a small pond short left, and two bunkers down the right. Finding the fairway is a must in order to hit this green in regulation. Most players will have a mid-iron approach shot that plays slightly longer than advertised in the yardage book.
The green has bunkers left and right and a false front. There is also a sweeping run-off area that wraps around behind the bunkers and the back of the green. Keep it simple—hit it smooth off the tee, hit the middle of the green, and walk away with a par.
Hole 18 - Par 4 - 318 Yards
Don't get fooled by the yardage: this 321-yard hole has some very sharp teeth. It is deceptively longer than the yardage indicates as you play up the escarpment to an elevated green, and it requires two accurate shots to have a chance at par. The fairway has two tiers and is exceptionally well-bunkered: two on the left, and three on the right between a series of Walter Travis mounding. The key to hitting this green in regulation is being on the fairway. Once again, precision over distance is a priority. Balls short or left are blocked from the green; balls on the right can land in one of the three bunkers or mounds that line the right side of the fairway.
A tee shot down the middle that lands between the 100-yard marker and the left bunker is perfectly positioned for a lofted approach shot needed to stay on the green. A drive that lands right of the 100-yard marker will break to the right and stop at least 15 yards farther away from the elevated green. The yardage calculation is critical for the second shot—go up at least one club or 10%. It’s not uncommon to see the ball spin back and off the green. Play smart and aim for the middle of the green.
This green is deceptively tilted from the back-right corner to the front left, and any ball behind the flagstick results in a risky downhill breaking putt that will pick up speed as it passes the hole. First-timers might not see it. Beware of the front left pin placement, especially if the wind is blowing from the clubhouse.
Your best chance of making a putt on the 18th is uphill from below the hole. Every other putt is a challenge. The best way to enjoy the 18th hole is from the 19th hole patio—very entertaining!